How to Redirect an expired domain using the htaccess file
20-01-2024 - General, Guides, htaccessHow to Redirect an expired domain using the htaccess file
In this blog post we give you a easy to follow step-by-step guide, that helps you leverage the .htaccess file to reroute traffic – and with it, the hard-earned SEO equity – from an expired domain to your current website. Mastering how to redirect an expired domain using the .htaccess file is an easy way to ensuring that you can make good use of an expired domains SEO juice and traffic. When a domain’s life cycle ends, the SEO value accumulated doesn’t have to dissipate. With well-planned redirects, you can strategically channel this value to enhance another domain’s standing in the eyes of the search engines.
But what is a htaccess file?
The .htaccess file is a small but mighty tool that website managers use – think of it as a set of instructions that tells the website’s server how to behave in certain situations. It’s a simple text file, yet it has the authority to carry out important tasks like redirecting users from one webpage to another, protecting private areas of the site with a password, and improving how fast your website loads.
The name .htaccess stands for “hypertext access,” and it’s exclusive to servers that run Apache, which is a popular software used to serve websites on the internet. While you might not see it as you browse a website, the .htaccess file is often working in the background, making sure that visitors have a smooth experience. Every time someone visits a page on your site, the server checks the .htaccess file for any special instructions related to that page. So, if you’re moving parts of your website around or changing an expired domain, this little file plays a big role in guiding people to the right place.
But what if you don’t wanna deal with the htaccess file?
For those looking to redirect domains without delving into server files, Cloudflare offers a user-friendly alternative to the .htaccess file. With its intuitive interface, Cloudflare simplifies the redirection process, allowing you to set up forwarding rules with just a few clicks. This method often proves to be easier and less intimidating, especially for users not comfortable tweaking server configurations. We made an easy step-by-step guide in our recent blog post “How to Redirect an Expired Domain with Cloudflare“, if you prefer not to deal with the htaccess file
Step 1 – Open your FTP client and Quick Connect
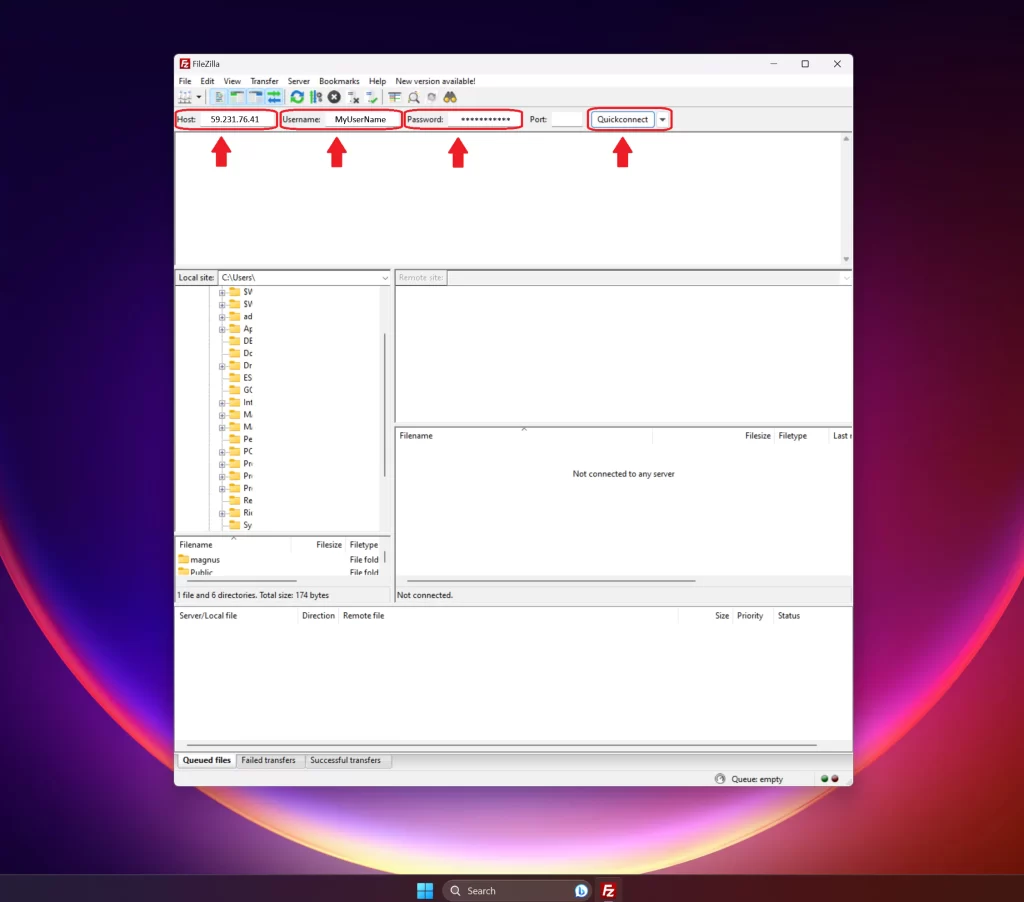
Start by opening your favorite FTP client – and if you don’t have any FTP clients installed – an easy to use and free ftp client, is FileZilla.
Once you have opened your FTP client, Connect to your FTP server, with the – IP, Username and Password – provided by your hosting company
Step 2 – Go to /public_html and download htaccess
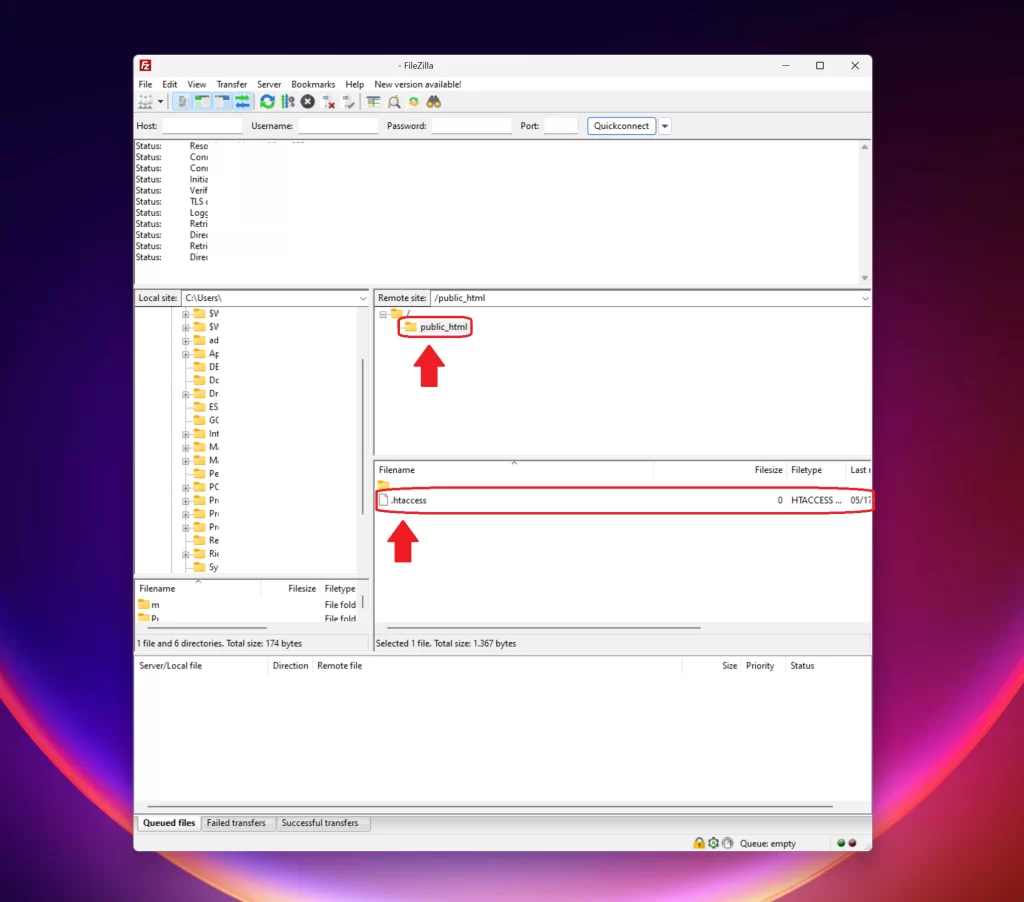
Once connected to your FTP server, you should be able to see the folder structure – in your FTP client. Find the public_html folder and open it.
In the public_html folder, you should find a htaccess file (+ possible other files aswell) – download or drag the htaccess file to your desktop
Step 3 – Open htaccess in a text editor
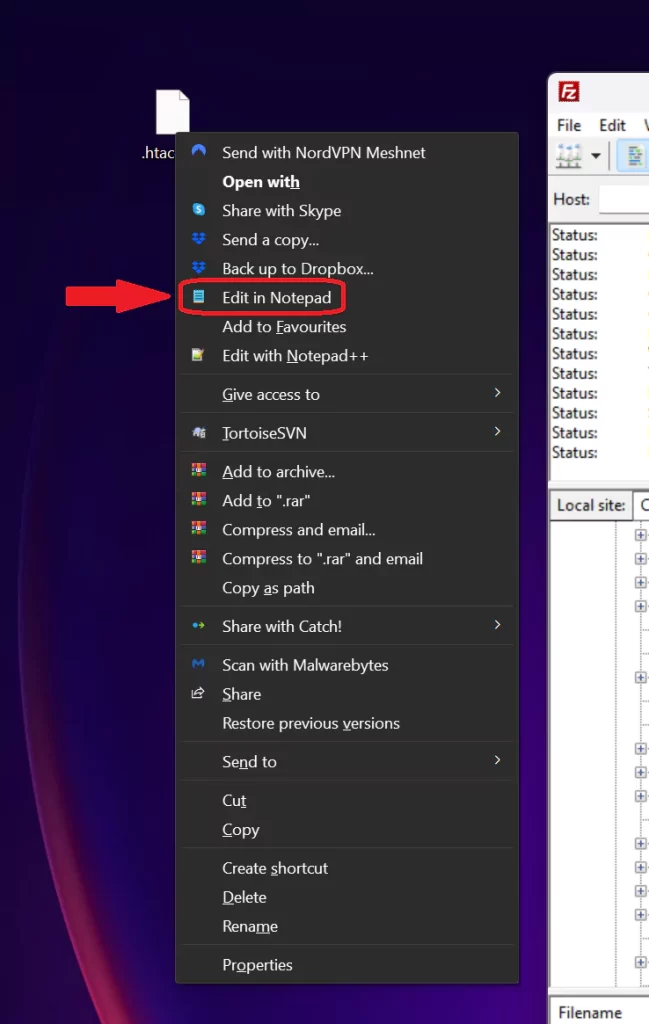
Once the htaccess file is downloaded to desktop, open the fil in ANY texteditor – like notepad, notepad++, word, or even google doc
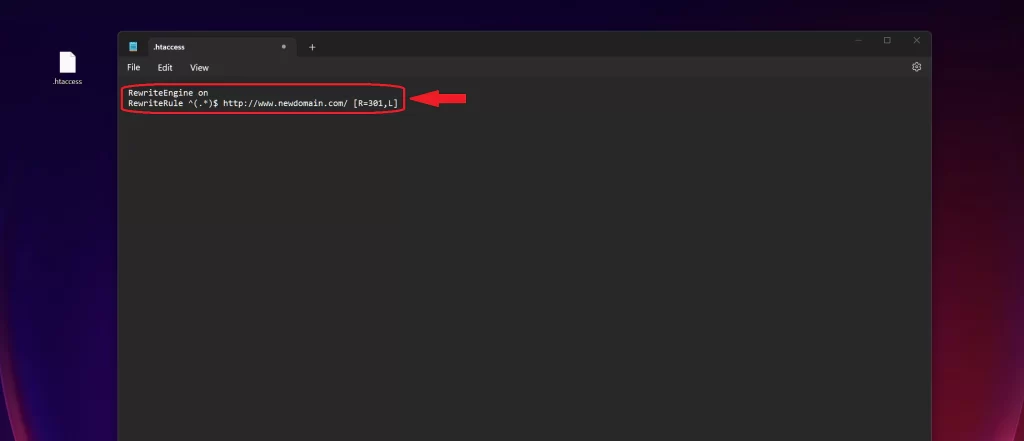
Step 4 – add the redirect rules
Delete any text or similar in the htaccess file and copy the redirect rules blow into the file
RewriteEngine on
RewriteRule ^(.*)$ https://newdomain.com/$1 [L,R=301,NC]
Change newdomain.com to the url of the website you wish to redirect traffic to – and then save the file
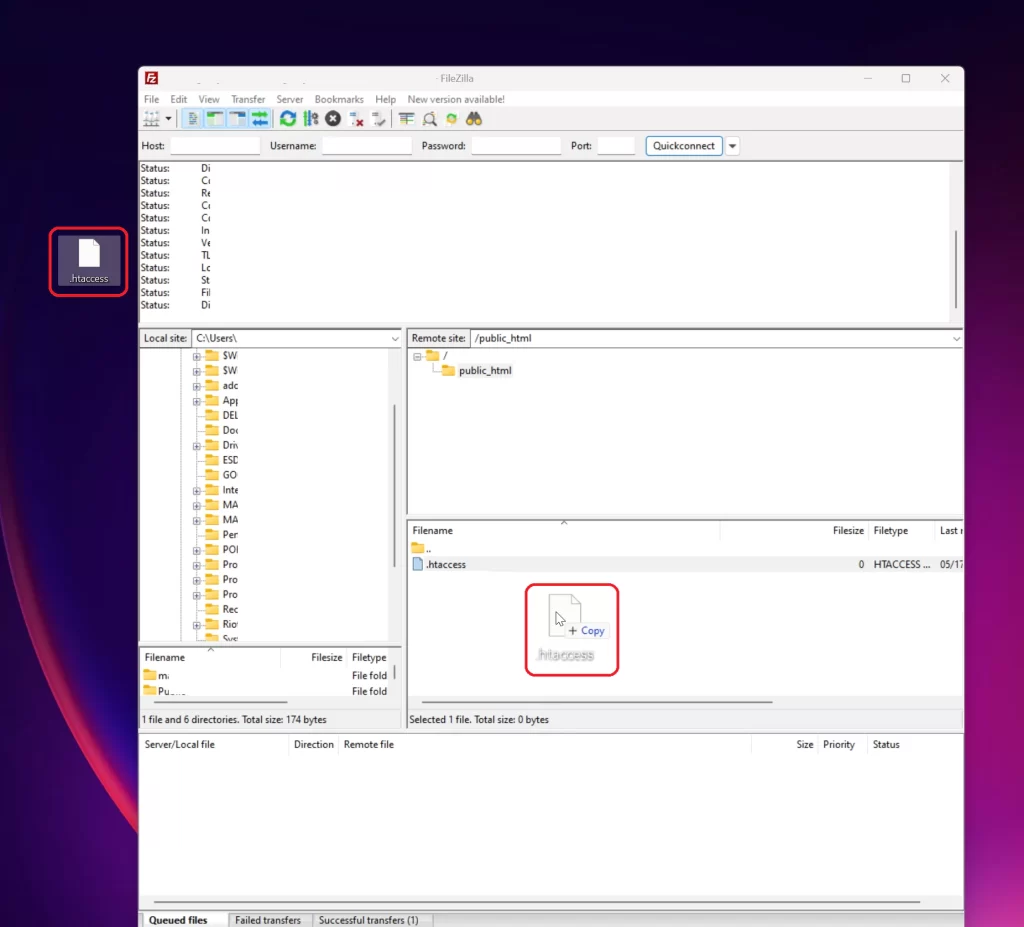
Step 5 – Drag’n’drop the htaccess file
Last step is to drag’n’drop the htacess file into the same folder that you downloaded it from – and overwriting the old htaccess file.
Once you have done this, you are not done – and you old domain should now redirect all traffic to your choosen website!
