How to create wildcard subdomains with .htaccess and Apache
27-05-2024 - General, Guides, htaccessAn introduction on how to create wildcard subdomains
Subdomains are an essential tool for enhancing your website’s performance and providing an improved user experience – and by hosting different aspects of a website or application on various subdomains, you can achieve faster load times and more efficient content delivery. This setup can be particularly beneficial for large-scale websites or applications that require different functional segments such as a blog, an online store, or user account portals, each of which might have different performance needs. For an in depth explanation of subdomains we have an excellent blog called “What is a Subdomain?“
And understanding how to create wildcard subdomains, in particular, allows you to dynamically generate subdomains without having to create each one manually. This method is extremely useful for applications where users might have personalized subdomains, such as user-specific dashboards or content. With the help of .htaccess and Apache, you can efficiently set up and manage these wildcard subdomains.
Whether you are a novice developer or a seasoned professional, this tutorial aims to provide clear, step-by-step instructions to help you leverage the full potential of subdomains, making your website more dynamic and scalable, with the help of .htaccess and Apache.

Understanding Wildcard Subdomains
While we can create subdomains individually, such as dashboard.mysite.com for a dashboard application, and host different apps on them, a wildcard subdomain allows you to use any subdomain (like anything.yourdomain.com) without needing to create each one manually. This is particularly useful for applications like multi-user platforms, where each user might have their own subdomain. For instance, platforms like Shopify and Medium utilize this approach to streamline their operations. The implementation of wildcard subdomains can offer various benefits, including improved business operations, enhanced security, better performance, and insightful data analysis.
By automating the creation of subdomains, you not only save time but also ensure a more scalable and flexible architecture. This method can significantly reduce administrative overhead, simplify DNS management, and provide a more personalized experience for users. Whether you are running a SaaS platform, a custom user portal, or any multi-tenant application, leveraging wildcard subdomains can lead to a smoother, more efficient, and secure web environment.
Before Getting Started
This approach to creating wildcard subdomains is compatible with any DNS provider, ensuring flexibility and broad applicability regardless of your current setup. However, for the purposes of this example, we will be demonstrating the process using Namecheap as our DNS provider.
Step 1 – Go to Namecheap.com and Sign in
Start by heading over to namecheap.com.
Then hover over the “Sign in” link at the top of the navigation bar at the top of your screen and a login form will appear.


Step 2 – Fill out the login form
Now enter you login details and click on the “Sign in” button to log in to your Namecheap account.
On successful authentication, you’ll be redirected to your Dashboard – here you can manage all your Namecheap services (ie Domains, Hosting, Emails, etc).
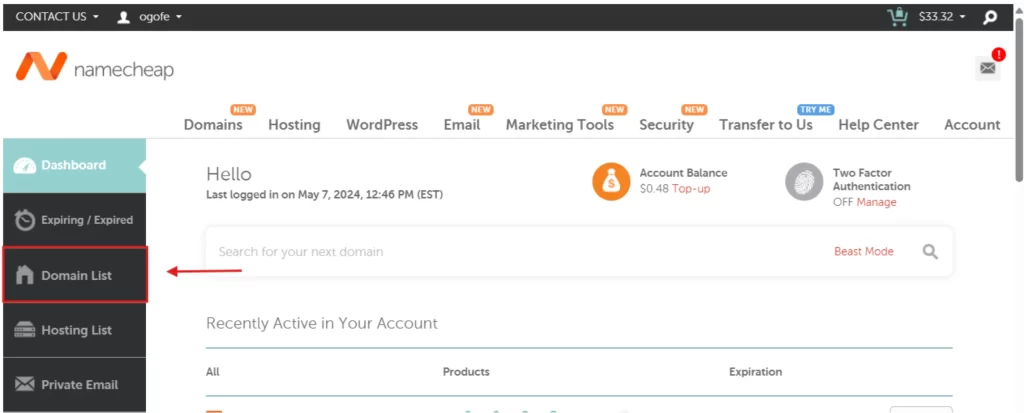
Step 3 – Navigate to “Domain List”
On your dashboard, using the navigation bar to your left, click on the “Domain List” link to go to the Domain Page
Step 4 – Locate the domain and click “Manage”
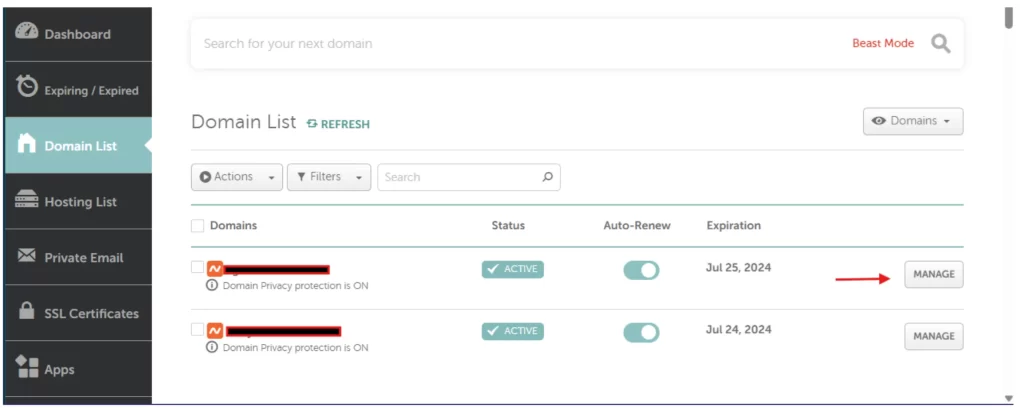
While on the domain management page, first locate the row for the domain you wish to add/remove/change a DNS record for.
When you have located the domain, you press the “Manage” button to the left
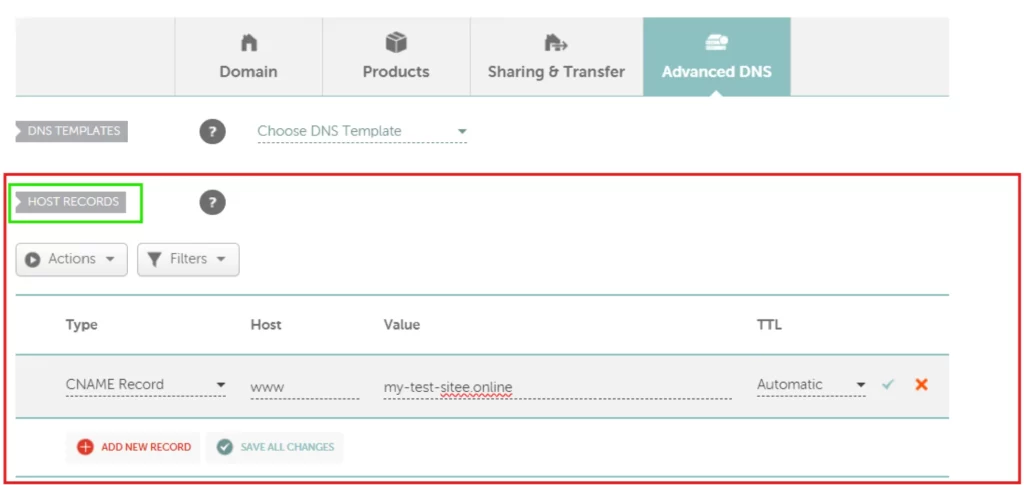
Step 5 – Find and “Advanced DNS”, Then “Host Records”
You should now be on a page, that is dedicated to the chosen domain. From here you wanna find the “Advanced DNS” Tab – and click it.
On the “Advanced DNS” tab, scroll down to the section “HOST RECORDS” – from here, you can add, edit, and remove DNS records from you DNS host.

Step 6 – Click “Add new Record”
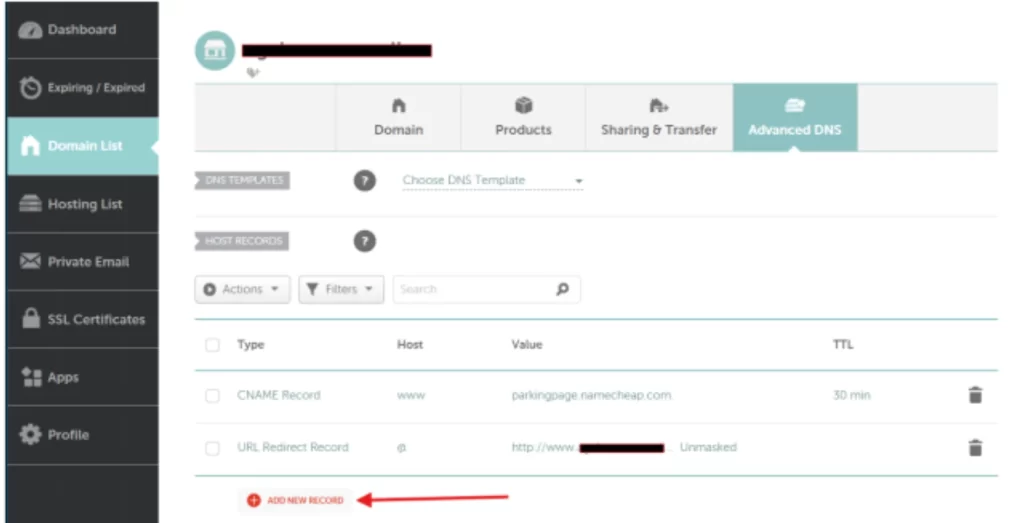
Click on the “Add New Record” button to add a new DNS record.
.
Step 7 – Create your Type A DNS record
For the Type you select “A Record”.
For the Host you select should write “*” – indicating that its a wildcard. You could potentially also write *.yourdomain.com. But your DNS will automaticly recognize * as a subdomain, so it will know that by writing “*” you mean “*.yourdomain.com”.
For the Value, you write the IP of the server your website is hosted on.
For the TTL (Time to live), select “Automatic”
.


Step 8 – Fill in the rest, and press the check mark
Now fill in the other required fields, including the host, value and TTL (Time To Live – recommend you set to Automatic) and click on the Save Changes button (the green checkmark).
Then Click on “Save All Changes” or the green “Checkmark” button to save your new DNS record.
Note that changes to your DNS, including DNS records can take up to 48 hours, but it’s usually takes around 30 minutes.
(Step 9 – Configure your Apache Server)
This step is not nessecary unless you run your own server, or has a dedicated host – and if you are not sure if you have that, you does not – so go to the next step.
Login to your server with your choosen program, and depending on your setup open either:
1) `/etc/httpd/conf/httpd.conf`
2) `/etc/apache2/sites-available/000-default.conf`.
Now add a virtual host block, by writing the following:
<VirtualHost *:80>
   ServerAlias *.yourdomain.com
   DocumentRoot /var/www/yourdomain
   <Directory /var/www/yourdomain>
      AllowOverride All
      Require all granted
   <Directory>
</VirtualHost>
Save your configuration file and restart Apache


Step 10 – Access Your Server
Now you need to access your website’s files. Typically, you would do this via FTP (File Transfer Protocol) or through your web hosting control panel.
Step 11 – Create or Edit .htaccess File
In the root directory of your website, look for a file named `.htaccess`. If you don’t find one, you can create a new text file and name it `.htaccess`.
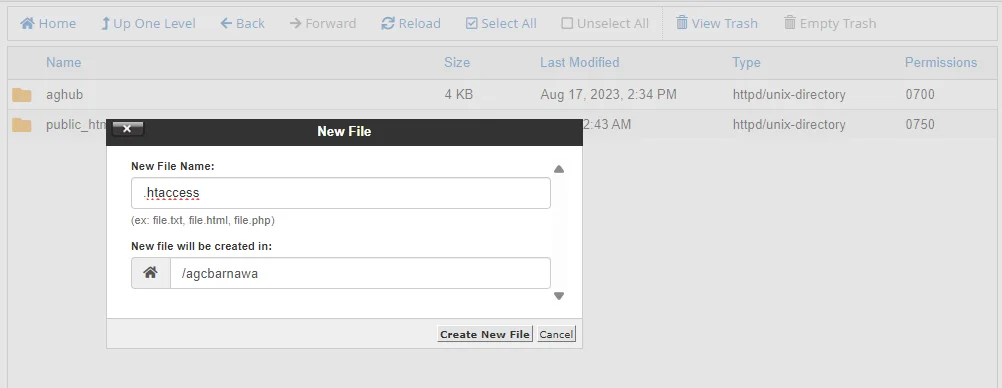

Step 12 – Add the rewrite block to your .htaccess file
Inside your htaccess file, you wanna add the following code (you can exclude “RewriteEngine On”, if its already in your file)
RewriteEngine On

RewriteCond %{HTTP_HOST} ^([^\.]+)\.yourdomain\.com$ [NC]
RewriteCond %{REQUEST_URI} !^/subdomains/
RewriteRule ^(.*)$ /subdomains/%1/$1 [L]

RewriteCond %{HTTP_HOST} ^([^\.]+)\.yourdomain\.com$ [NC]
RewriteCond %{DOCUMENT_ROOT} !^/subdomains/%1 -d
RewriteRule ^(.*)$ /subdomains/%1/$1 [L]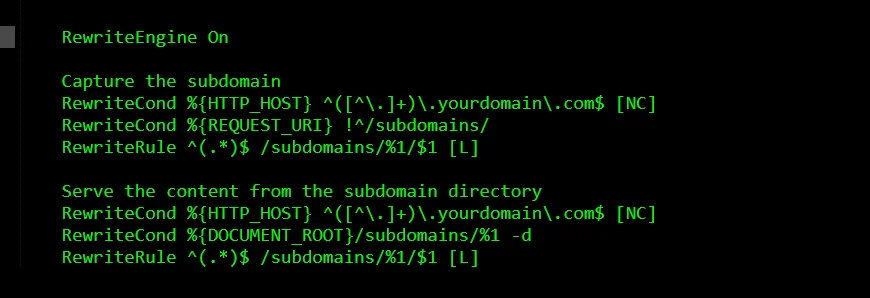

Step 13 – Save/Upload your .htaccess file
Save the changes to your `.htaccess` file, and upload it to your website’s root directory if your made edits locally.
And the server should now redirect any requests to a subdomain to the folder /subdomains/[subdomain-name].
So if somebody tries to visit [yoursubdomain].[yourdomain].com – the webserver will try to fetch the subdomains from the a folder named /subdomains/[yoursubdomain] in your root directory.
