How to change nameservers, Hostgator.com
11-11-2023 - Guides, HostGator.comHow to change nameservers, Hostgator.com
If the idea of navigating domain and web hosting management is weighing on you, take comfort in knowing that many share this feeling. A pivotal element to taking your online venture live is the adjustment of your nameservers. Why is this essential? Nameservers act as the traffic guides, pointing your domain towards your hosting server and putting your site on the virtual map.
Whether you’re transitioning to a fresh web hosting service, debuting your website, or aiming to boost your site’s loading speed and reliability, understanding how to update your nameservers is paramount. Although the task can appear intricate, particularly as each domain registrar presents its own set of procedures, there is no need for concern.
We’ve crafted an uncomplicated, yet thorough tutorial specifically for hostgator.com clientele. With our step-by-step instructions, you’ll find the complexity of nameserver changes unraveled before you. Embrace the knowledge of nameserver updates and you can unlock improved performance for your site, enhancing the success and satisfaction of your online presence.
Want to know how you change nameservers, on other domain registrars?
If you’re looking to change your nameservers with other domain registrars, we have compiled a list down below of our guides for other domain registrars
Step 1 – Fill out email/account name
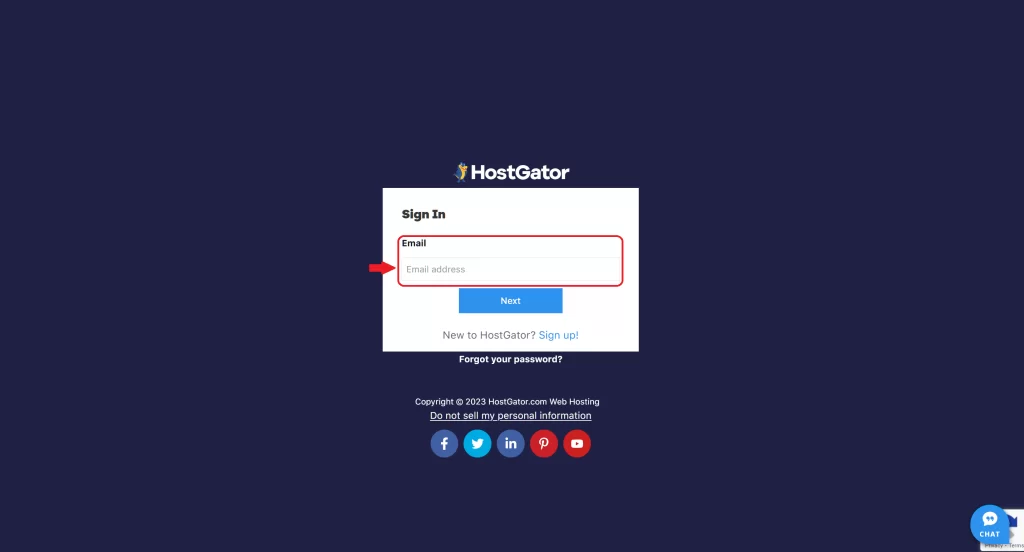
First go to the hostgator login portal – here you will se a login form – start by entering your email/account name.
Step 2 – Fill out email/account password
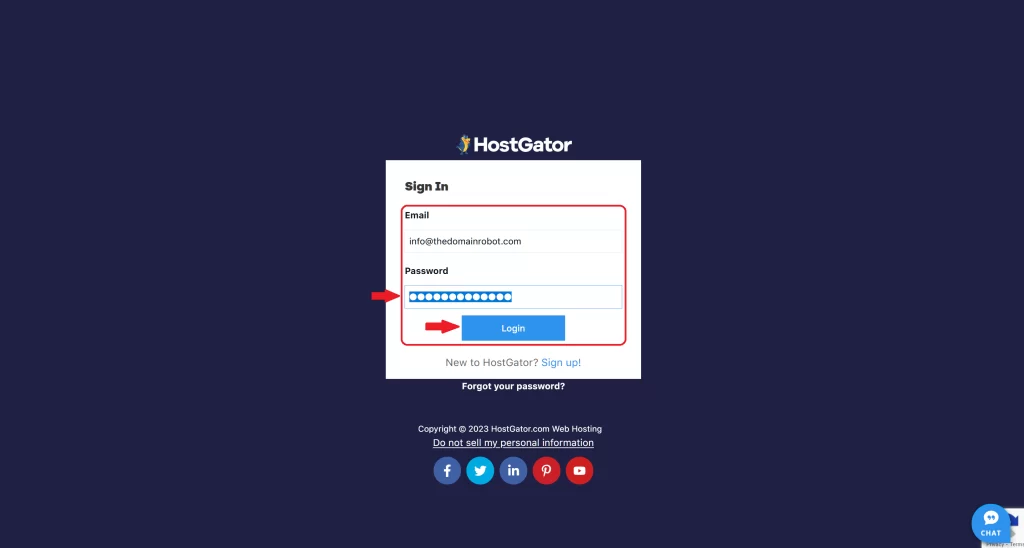
After entering your email/account, you will be prompted to enter you password. Fill out your password and click “Login”
Step 3 – Locate and click “Manage Domain”
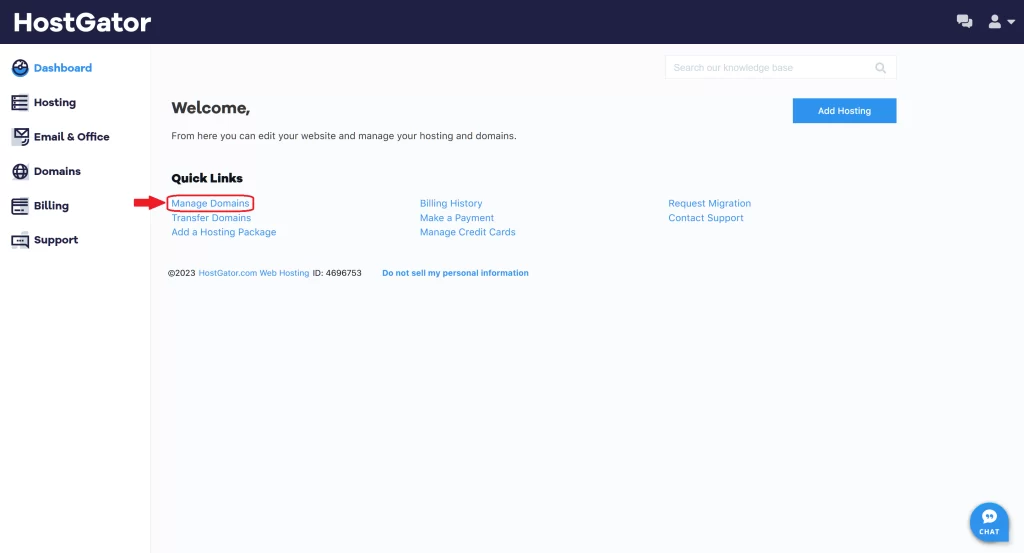
After logging in, you should now be at the HostGator Dashboard, under “Quck Links”, locate “Manage Domain” and click it.
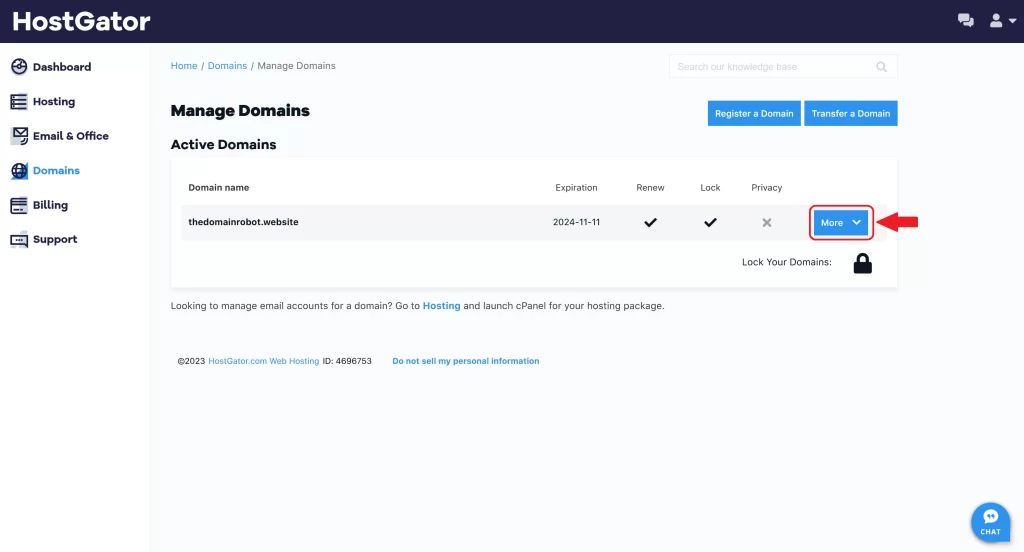
Step 4 – Click “More”
Now locate the domain, you wish to change nameservers for, in the “Active Domains”-table.
After locating the specific domain in question, locate the button named “More” in the right side, and click it.
Step 5 – Locate Nameserver and click “Change”
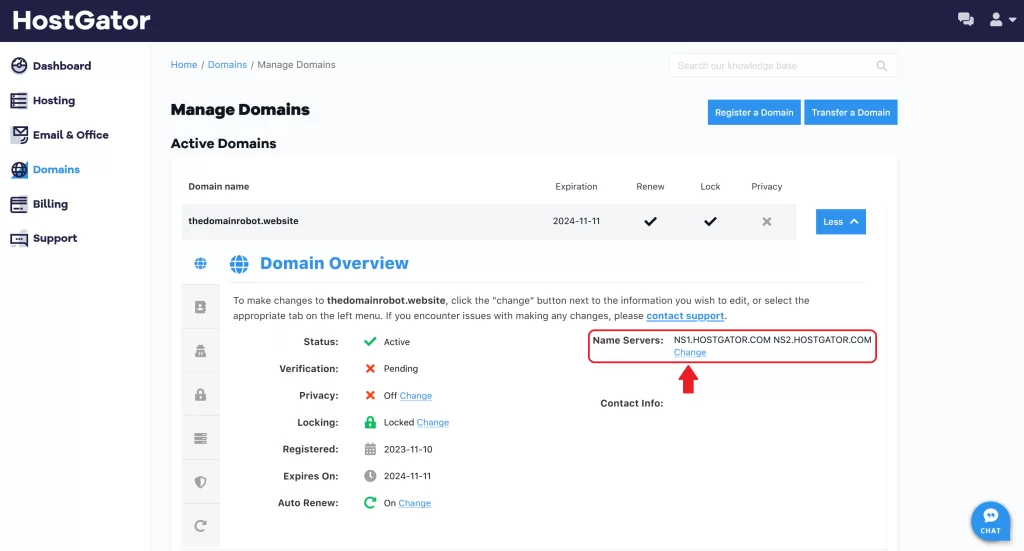
Pressing the “More” button associated with the domain, should open the “Domain Overview”.
In the “Domain overview” find “Name servers” – and just beneath it, you should see “Change” – click the “Change” link.
Step 6 – Remove the current nameservers
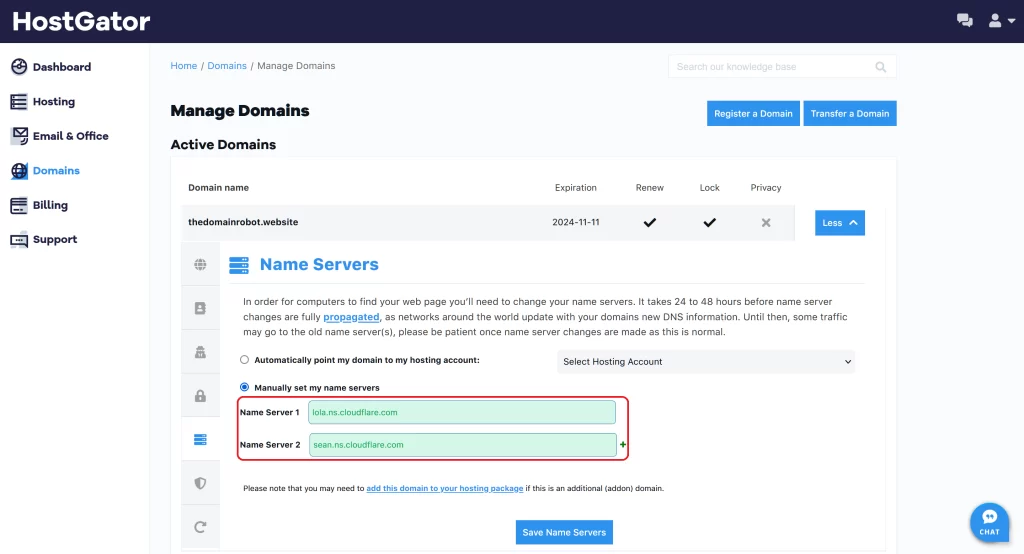
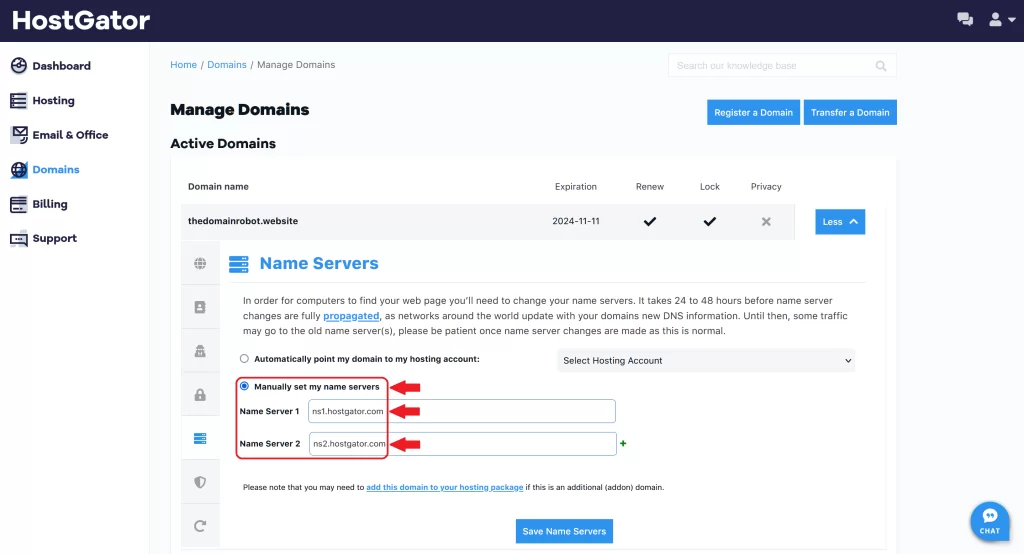
You should now be in the “Name Server” tab – here you should see 2 options:
- Automatically point my domain to my hosting account
- Manually set my name servers
if “Manually set my name servers” is not already selected, click it.
Now 2 Input fields should appear, and already be populated with your current HostGator nameservers – select the input fields, and delete them
Step 7 – Insert new nameservers
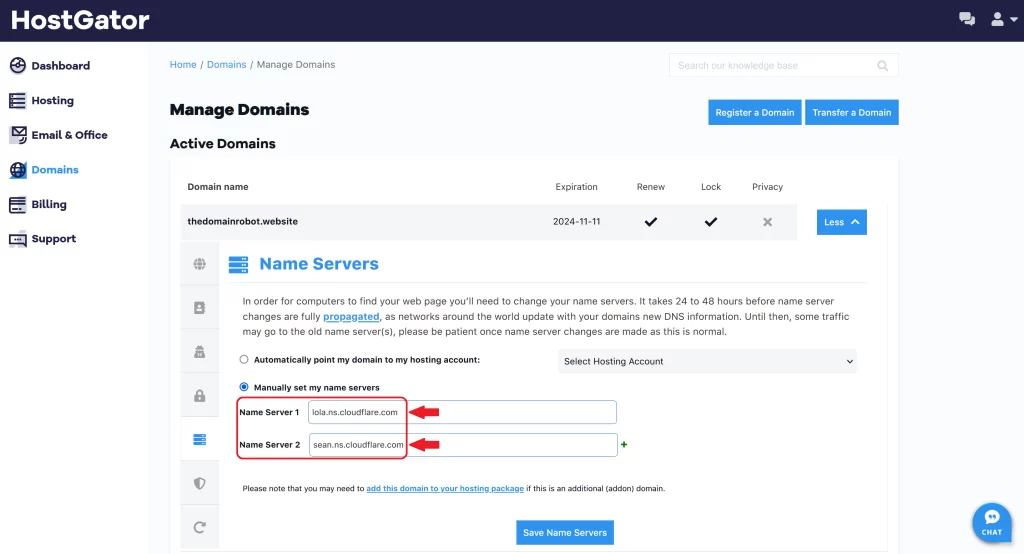
After deleting the pre-populated nameservers, fill the input fields, with the nameservers provided by your new DNS provider.
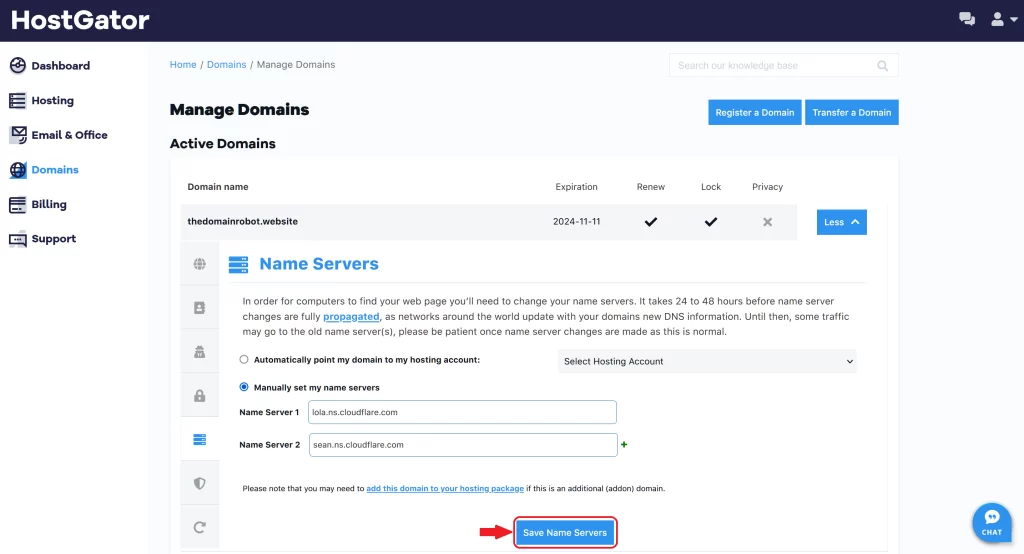
Step 8 – Click “Save name servers”
After filling out:
- Name Server 1
- Name Server 2
Click the “Save Name Servers”
Step 9 – Wait
This is by far the most important step, you have to patiently wait. Because of how DNS caching works, changing anything related to your DNS – can take from 10 min to 24 hours to propagate through out all DNS servers around the world. In our experience, you should expect it to take around 1 hour to propagate to most DNS servers around the world, but it is very likely it takes way longer!
But besides the waiting? You have now manage to change your DNS servers, congratulation!
