How to change nameservers, NameCheap
09-11-2023 - Guides, NameCheap.comHow to change nameservers, NameCheap
Navigating the intricacies of domain and web hosting management can be daunting, particularly when it involves understanding technical elements such as updating your nameserver. The nameserver plays a pivotal role—it points your domain to the server where your website resides, effectively mapping out your site’s address on the web.
Whether you’re transitioning to a new web hosting provider, launching a fresh online portal, or seeking to boost your site’s speed and reliability, updating your nameserver is a critical step. However, the process can seem obscure as each domain registrar has a unique set of procedures for making these changes.
Our comprehensive guide offers lucid, step-by-step instructions tailored for users of NameCheap.com. We’ll walk you through the entire process of altering your nameserver, ensuring you can smoothly implement changes without the hassle.
Want to know how you change nameservers, on other domain registrators?
If you’re looking to change your nameservers with other domain registrars, we have compiled a list down below of our guides for other domain registrars
Step 1 – Sign into your NameCheap Account.
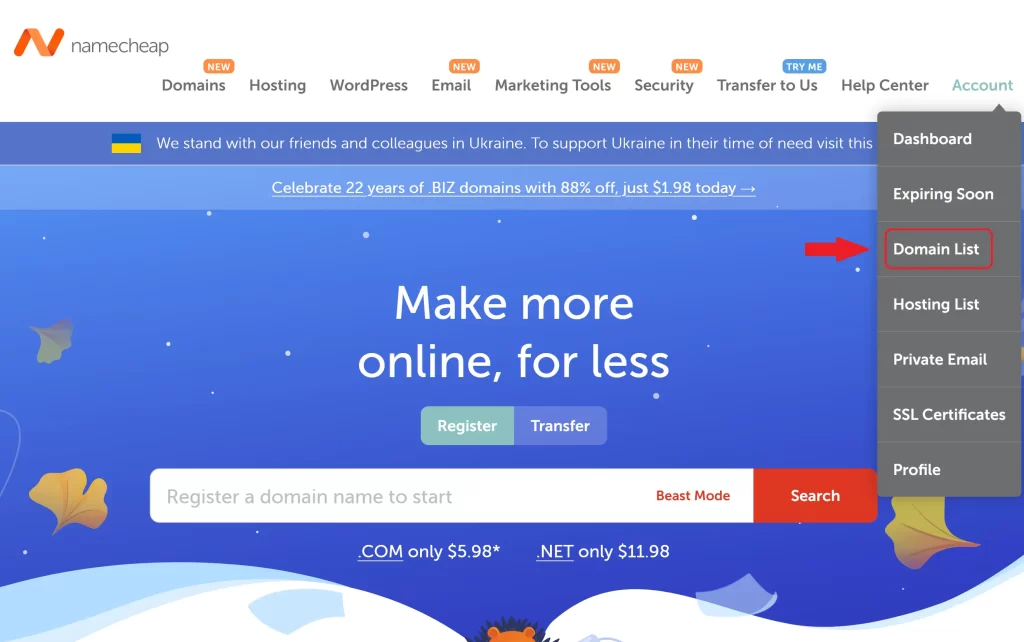
The first thing you have to do before doing anything else, is to go to NameCheap.com and in the right corner, hoover over the Account – until you see the dropdown menu. When the dropdown menu is visible, find the “Domain List” link, and press it
Step 2 – Manage Domain
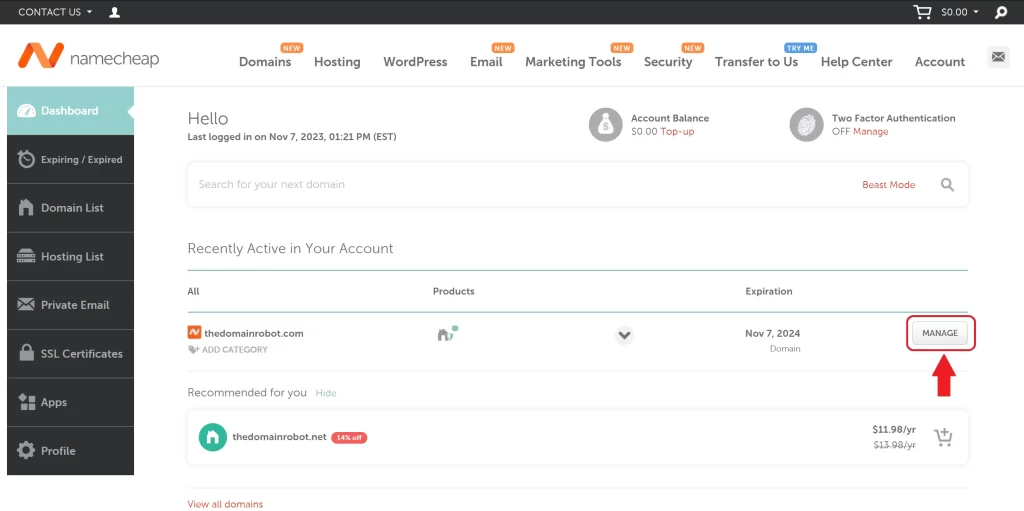
You should now be in your NameCheap Dashboard – and you should be able to see all Domains connected to your NameCheap account.
Now find the domain you want to change Nameservers for – and press the button “Manage”.
Step 3 – Locate Nameserver & Custom DNS
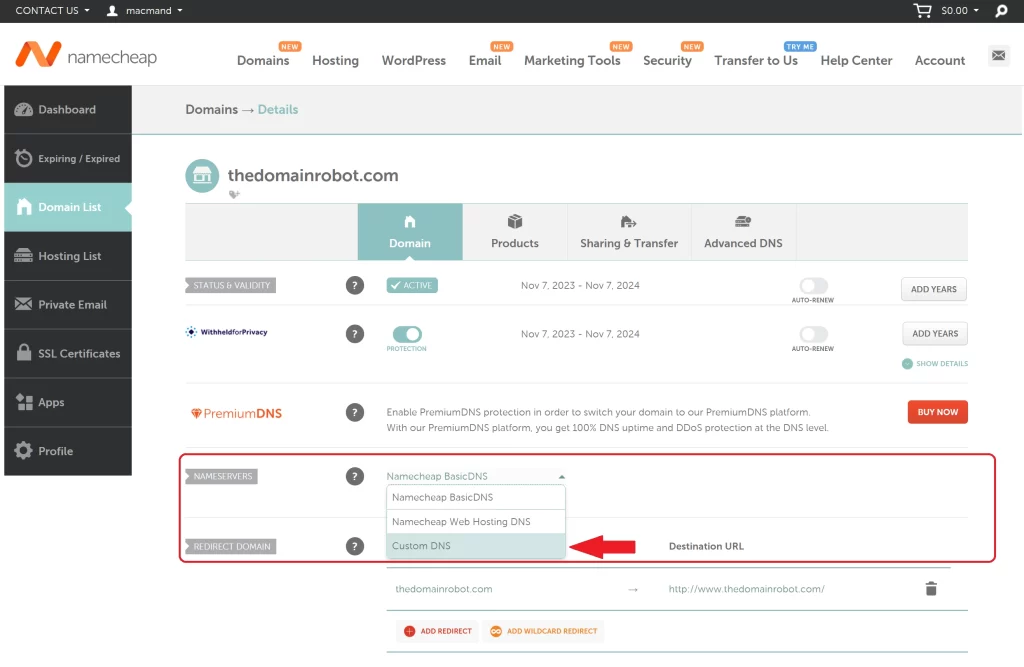
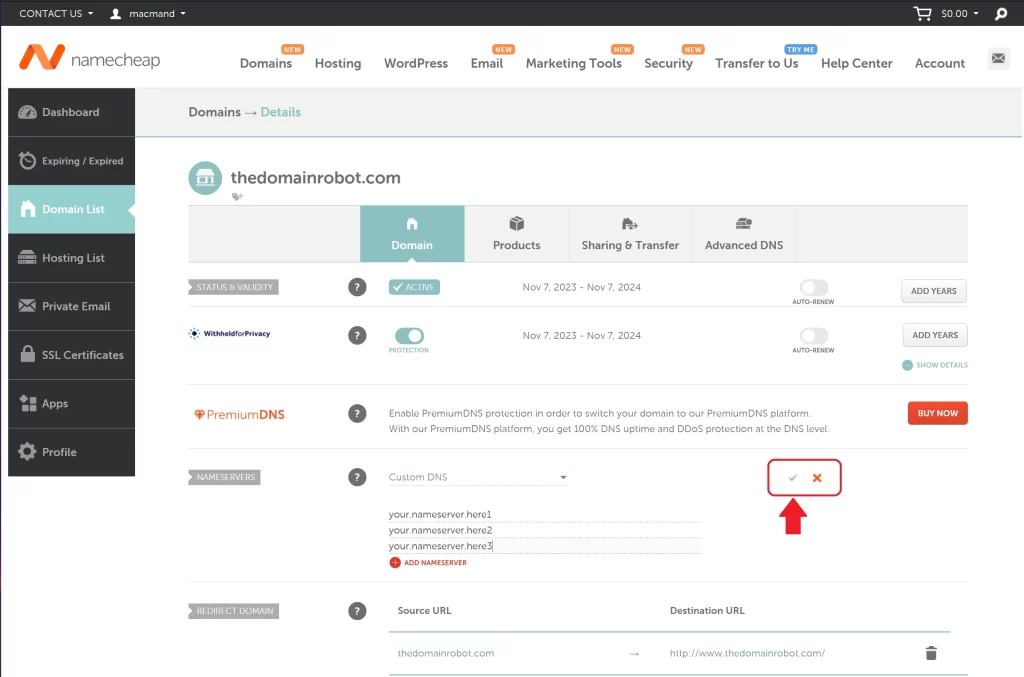
Now locate the Namecheap BasicDNS Dropdown list, and from the dropdown list, select “Custom DNS”
Step 4 – Add your Nameservers
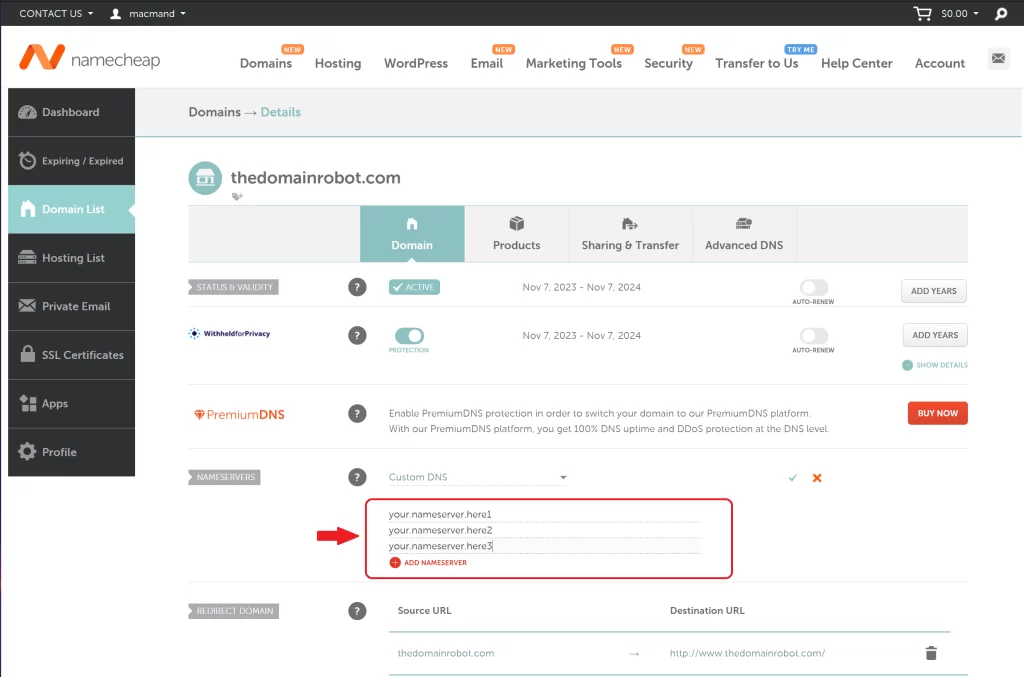
After pressing “Custom DNS”, you should now be able to add multiple new Nameservers – so add the Nameservers specified by your DNS provider
Step 5 – Accept Changes
After adding the new Nameservers, press the green Confirm button – to change your Nameservers to the ones specified.
Step 6 – Patiently wait
This is by far the most important step, you have to patiently wait. Because of how DNS caching works, changing anything related to your DNS – can take from 10 min to 24 hours to propagate through out all DNS servers around the world. In our experience, you should expect it to take around 1 hour to propagate to most DNS servers around the world, but it is very likely it takes way longer!
But besides the waiting? You have now manage to change your DNS servers, congratulation!
