How to change nameservers, One.com
09-11-2023 - Guides, One.comHow to change nameservers, One.com
Dealing with the complexities of managing a domain and web hosting can be challenging, especially when it comes to the technical details, like changing your nameserver. The nameserver is vital because it directs your domain to the hosting server where your website is located, essentially setting your website’s physical address on the internet.
If you’re switching web hosting services, starting a new website, or aiming to improve your website’s loading speed and dependability, it’s essential to update your nameserver. However, this task can be perplexing since every domain registrar has their own method for updating these settings.
Our clear and detailed guide is specifically designed for users at one.com, providing you with clear, step-by-step directions. We’ll guide you through the nameserver change process, helping you make the updates smoothly and without confusion. By learning how to change your nameserver correctly, you can improve your website’s overall performance with ease.
Want to know how you change nameservers, on other domain registrars?
If you’re looking to change your nameservers with other domain registrars, we have compiled a list down below of our guides for other domain registrars
Step 1 – Log in Dropdown
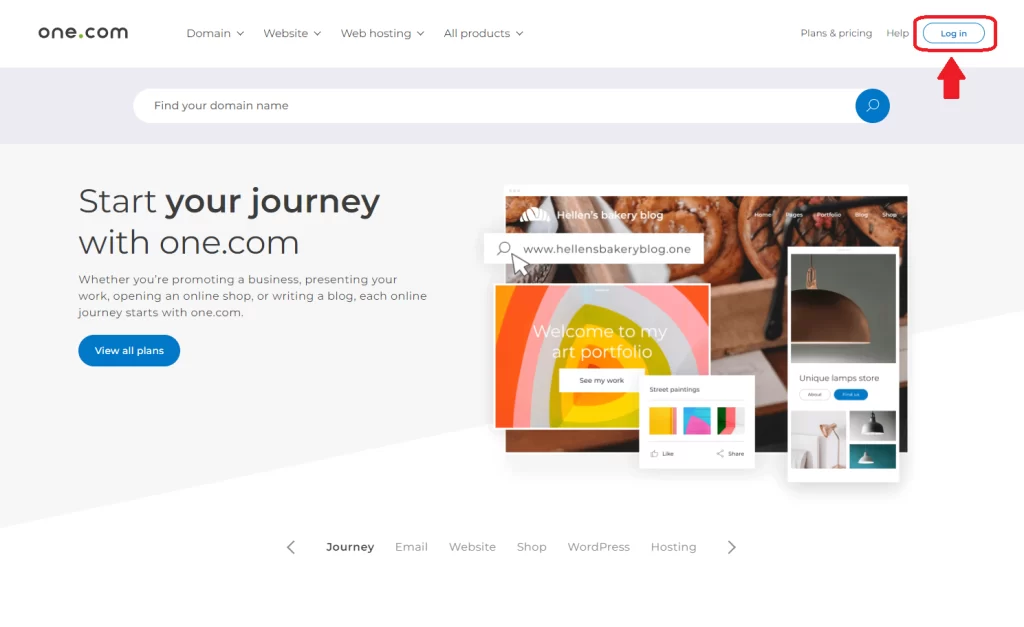
The first thing you have to do before doing anything else, is to go to One.com and in the right corner, click the “Log in” button.
Step 2 – Find the Control Panel sub menu
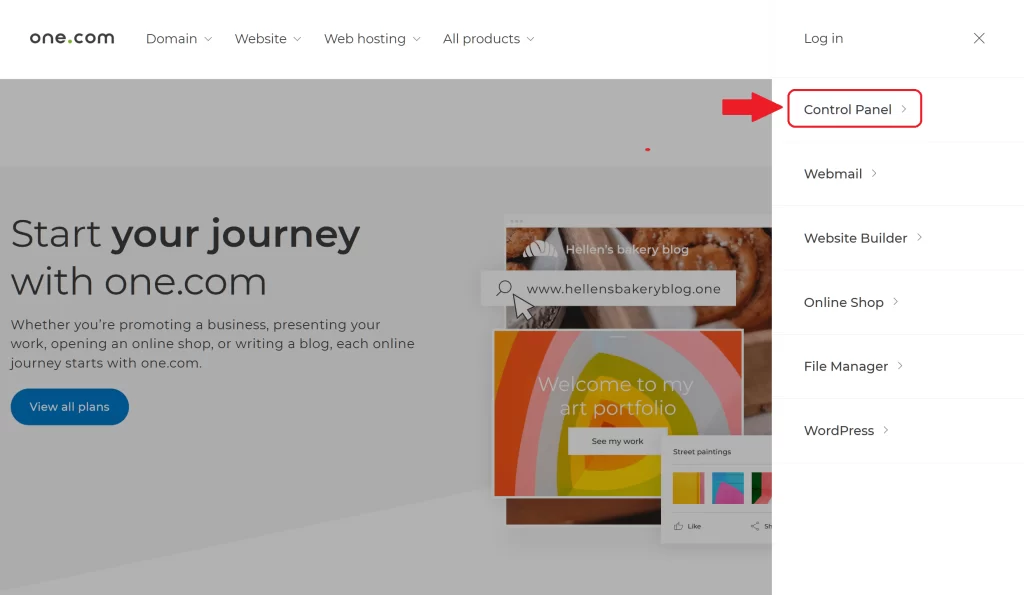
After clicking the “Log In” button, a drop down menu should appear – here you should see the “Control Panel” submenu – click it.
Step 3 – Sign in to your account
Now enter your email and password, and then click on “Log in”

Step 4 – Find DNS settings
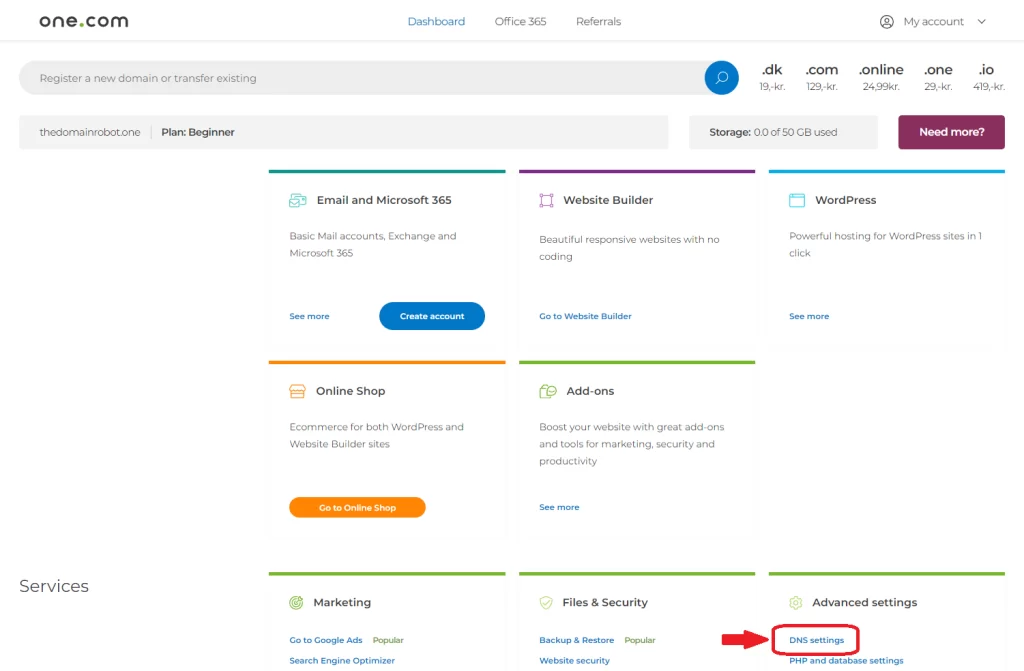
After a successful login, you should now be on one.com’s control panel. From the control panel you scroll down, until you find “Advanced Settings”.
Under “Advanced Settings”, here you should see a link called “DNS settings” – click on it.
Step 5 – Click the Name server tab
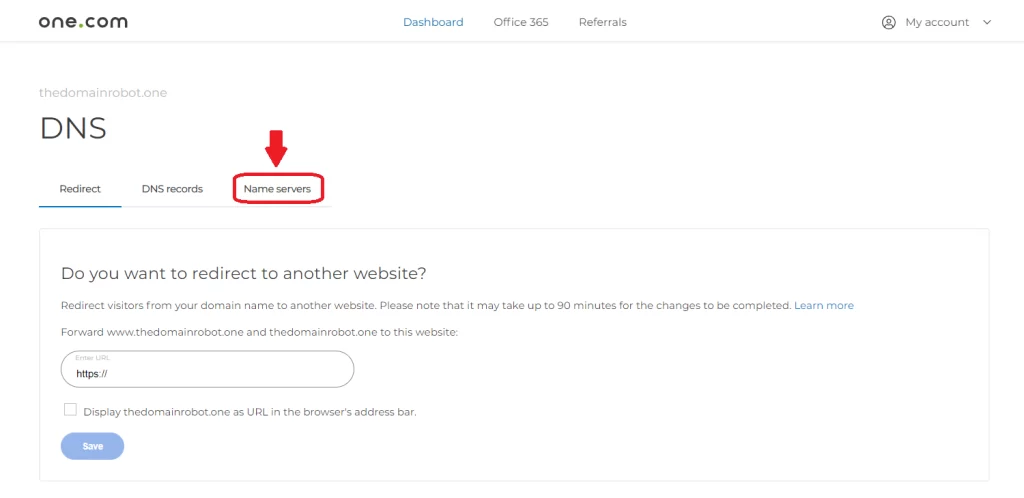
Now locate the “Name server” tab, and click on it
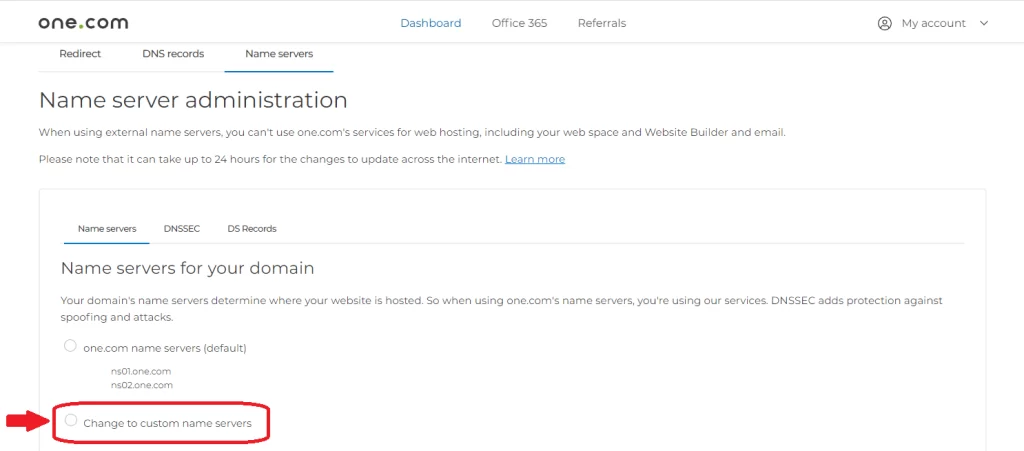
Step 6 – Click “Custom nameservers”
Locate and click “Change to custom name servers”
Step 7 – Insert nameservers
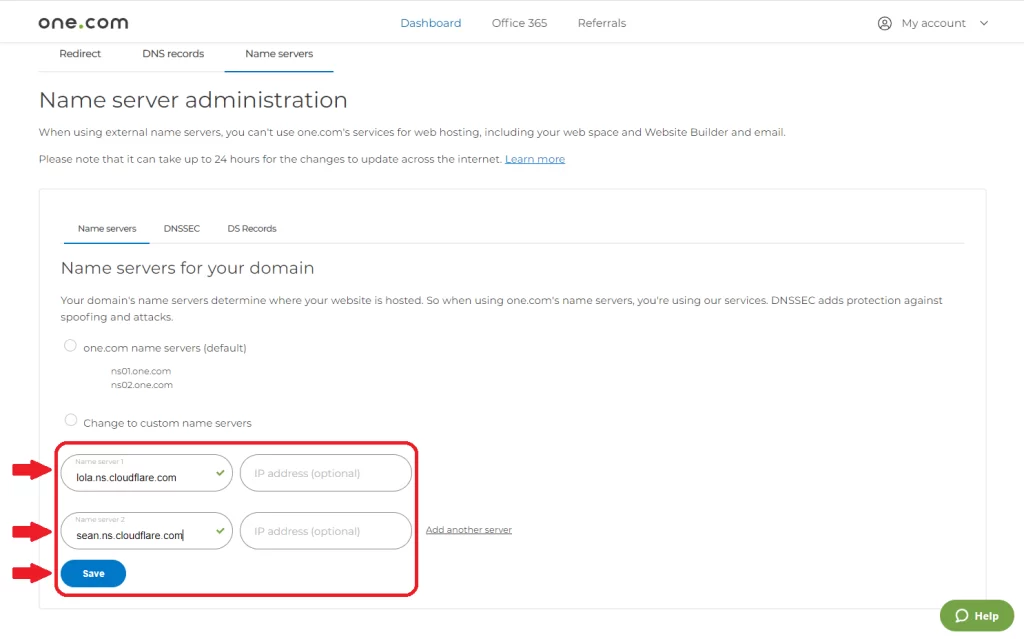
After clicking “Change to custom name servers”, 2 empty input fields should appear. Fill in those input fields with the nameservers given by your DNS provider. When both input fields been filled, click “Save”
Step 8 – Wait
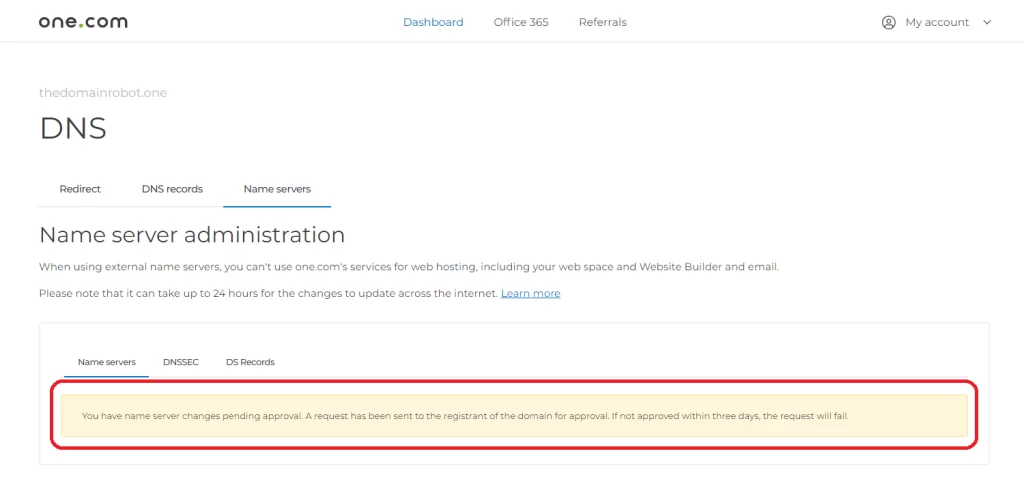
This is by far the most important step, you have to patiently wait. Because of how DNS caching works, changing anything related to your DNS – can take from 10 min to 24 hours to propagate through out all DNS servers around the world. In our experience, you should expect it to take around 1 hour to propagate to most DNS servers around the world, but it is very likely it takes way longer!
But besides the waiting? You have now manage to change your DNS servers, congratulation!
