Secure Your Assets, with Cloudflare Hotlink Protection
In the digital realm, safeguarding your online assets is paramount, and Cloudflare Hotlink Protection emerges as a formidable shield against unsolicited content leeching. With hotlink protection, you are empowered to prevent external websites from using your bandwidth by embedding your protected files, such as images or videos, on their platforms. Having hotlink protection active on your assets makes sure that unauthorized use is effectively thwarted, ensuring that only rightful visitors to your site are consuming your content and server bandwidth.
Need the domain first?
Runs the same live check as the front page. If it is taken we will show you when it expires.
What is Cloudflare Hotlink Protection
But what exactly is Cloudflare Hotlink Protection? It's a security measure implemented to prevent others from embedding your content - be it images, videos, or any other media - on their websites without your permission. Often referred to as "hotlinking," this practice can lead to increased server load, bandwidth theft, and the loss of control over how your content is presented and distributed. Cloudflare Hotlink Protection effectively stops this by ensuring that your content is only served to your own site, warding off any unwelcome external links that might attempt to leech off your resources.
In the end this helps you guard your website's content - it actively stops other sites from using your images or videos without your permission, which keeps your website running smoothly for your visitors. With hotlink protection in place, only the people who come to your site can see and use your content - and this in can also help lower the cost of running your website because it prevents your resources from being used up by others.
How to enable Cloudflare Hotlink Protection
Setting up Cloudflare Hotlink Protection is a straightforward process that shields your website's images and videos from unauthorized use. In the upcoming step-by-step guide, you'll learn how to activate this feature within the Cloudflare dashboard, ensuring that your content remains exclusive to your site and conserving your website's bandwidth for your actual visitors. Let's get started on fortifying your online presence with this essential security feature.
(Step 0 - Setup Cloudflare as your domains DNS)
If your domain is currently not using the Cloudflare DNS - we have made an easy to follow guide, you can find here: "how to setup cloudflare with your domain".
If your site is already active on Cloudflare, proceed to step 1
Step 1 - Go to Cloudflare.com
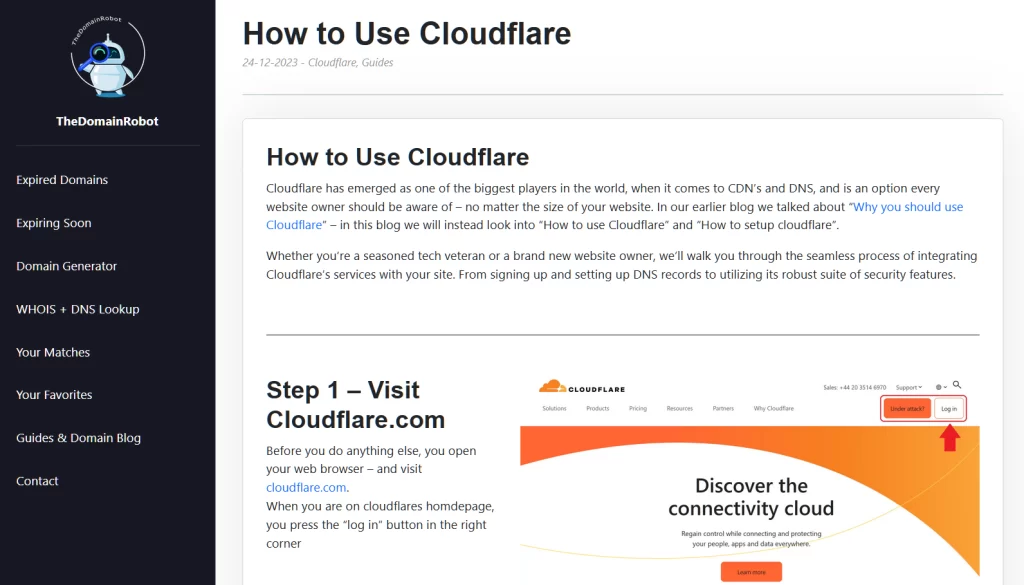
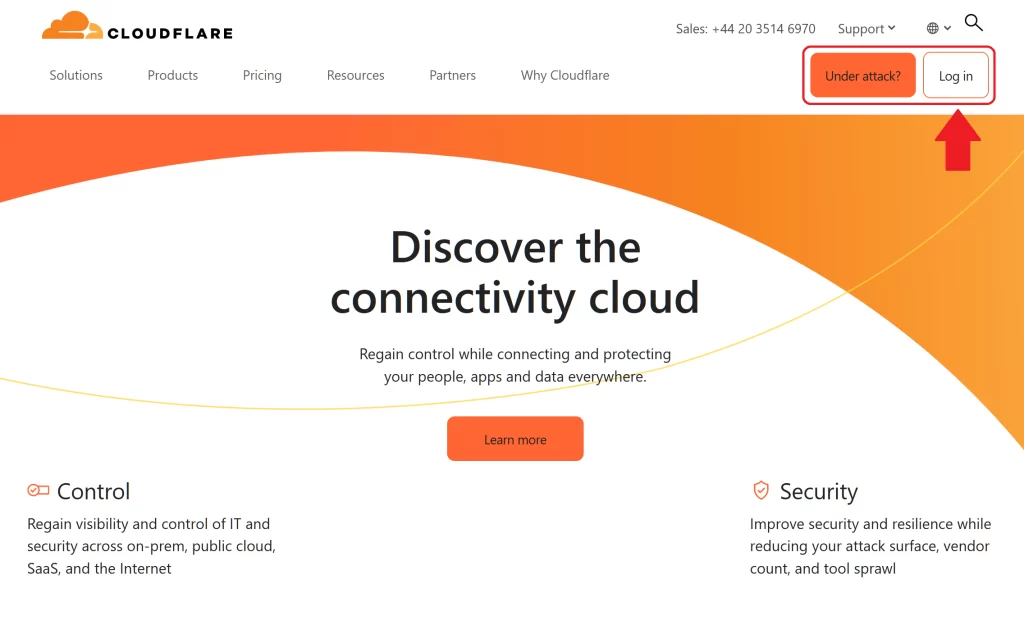
Open your web browser - and visit cloudflare.com.
When you are on cloudflares homdepage, you press the "log in" button in the right corner
Step 2 - Log in to Cloudflare
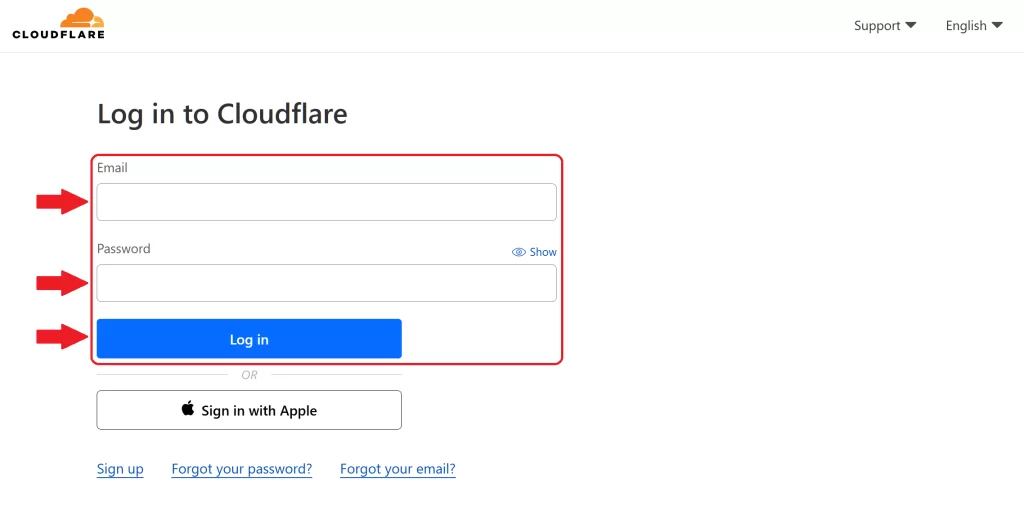
On the login form fill out the email and password for your Cloudflare account - then press the "Log in" button
Step 3 - Go to your Domain Dashboard
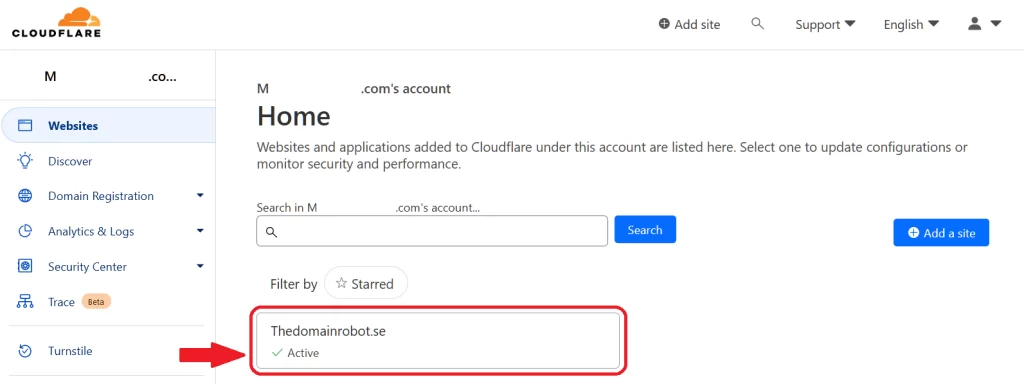
Once in your Cloudflare Dashboard, find your domain – and click it it.
Step 4 - Go to Scrape Shield Page
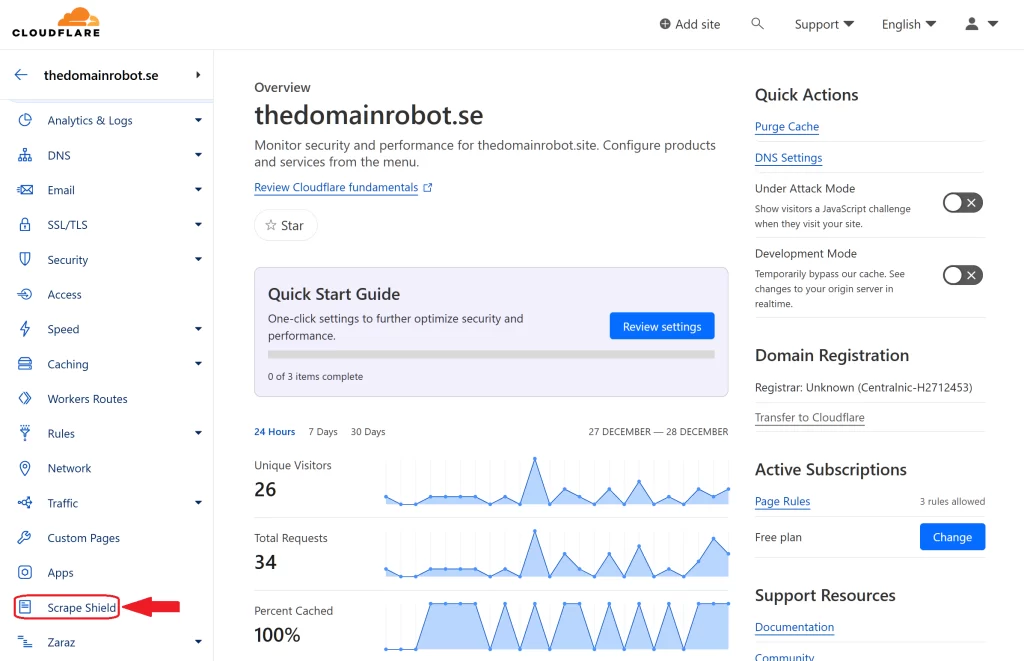
In the left most navigation panel, you wanna find Scrape Shield, and press it.
Step 5 - Toggle Hotlink Protection
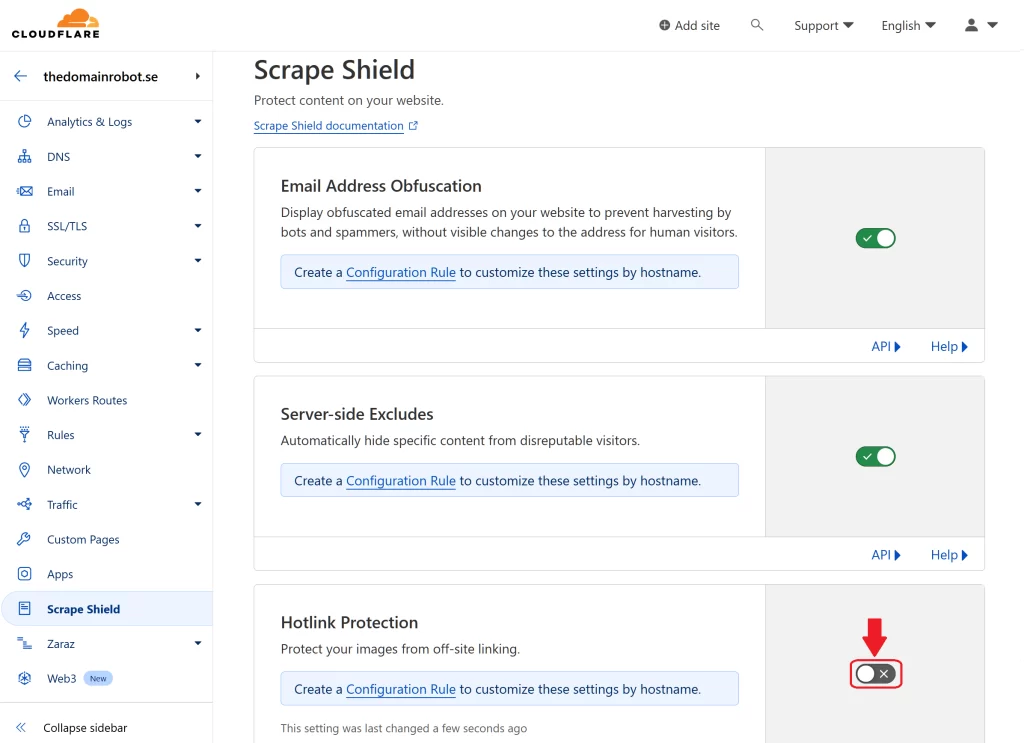
You should now be on the Scrape Shield page - here you should see 3 boxes - "Email Address Obfuscation", "Server-side Excludes" and "Hotlink Protection".
In the Hotlink Protection Box, you should be able to see a button that allows you to toggle Hotlink Protection - by default Hotlink Protection is disabled. Press the button, once to enable it.
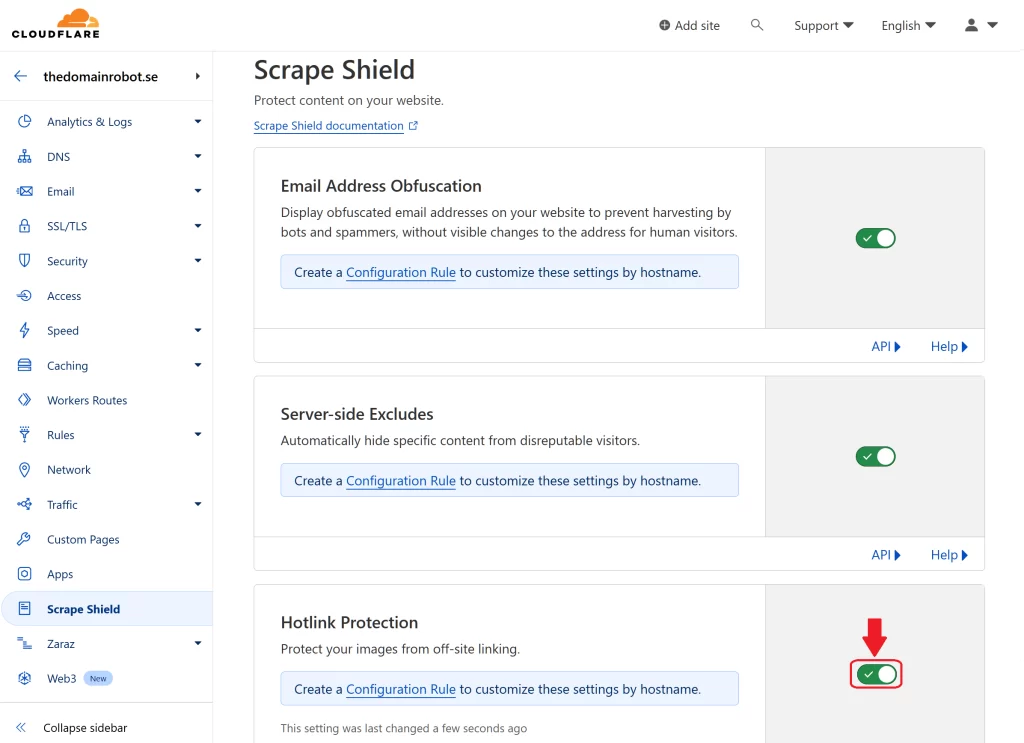
Step 6 - Cloudflare Hotlink Protection is now enabled
Congratulation, you have now enabled Cloudflare's Hotlink Protection, meaning that Cloudflare will try prevent anybody else from using your content - such as images, videos and so on
BUT wait! since it might not be obvious to everybody - using Cloudflares Hotlink Protection, only work if you use the cloudflare proxy IP's aswell. But this should be something everybody using Cloudflare should do by default, but in case does not already use this, and you dont know how to turn on Cloudflare proxies - we made a guide to help you - "How to turn on Cloudflare proxies"
Our Other Cloudflare Related Guides
When you have managed to If you're eager to deepen your understanding of Cloudflare and its suite of tools, you'll find our archive of Cloudflare-related guides invaluable. From setting up your first domain to optimizing website performance with Cloudflare's caching options, our comprehensive tutorials are here to assist. Don’t miss out on the wealth of knowledge we’ve compiled to help you make the most of Cloudflare's offerings. You can explore our other guides here:
- How to Use Cloudflare for a Turbocharged Website
- Your Ultimate Guide to Cloudflare Domain Redirect
- How to Turn on The Free Cloudflare Proxy Service
- Secure your website with the Free Cloudflare Bot Fight Mode
- How to Instantly Purge Cloudflare Cache
- How to Set Cloudflare Browser Cache TTL
- How to Redirect an Expired Domain with Cloudflare
- How to Enable Cloudflare Compression to Speed Up Your Site
- How to Enable Auto Cloudflare Minify for Free Performance
- How to Enable the Cloudflare Block Country Feature