How to change nameservers, Hostinger.com
10-11-2023 - Guides, Hostinger.comHow to change nameservers, Hostinger.com
Are you feeling overwhelmed by the thought of managing your domain and web hosting? Rest assured, you’re not alone. One critical step in establishing your online presence is updating your nameservers. This is important because nameservers are the signposts that direct your domain to your hosting server, essentially mapping your website’s address on the web.
Perhaps you’re making a move to a new web hosting provider, launching your first site, or seeking to enhance your website’s speed and reliability. If so, it’s crucial to know how to update your nameserver. It might seem daunting at first glance since each domain registrar has a unique method for making these changes.
Our straightforward, comprehensive guide is tailored just for users at Hostinger.com. We provide a easy-to-follow, step-by-step instructions that will demystify the process of changing your nameserver. Mastering the nameserver adjustment can lead to significant enhancements in your website’s performance, making your online venture more successful and enjoyable.
Want to know how you change nameservers, on other domain registrars?
If you’re looking to change your nameservers with other domain registrars, we have compiled a list down below of our guides for other domain registrars
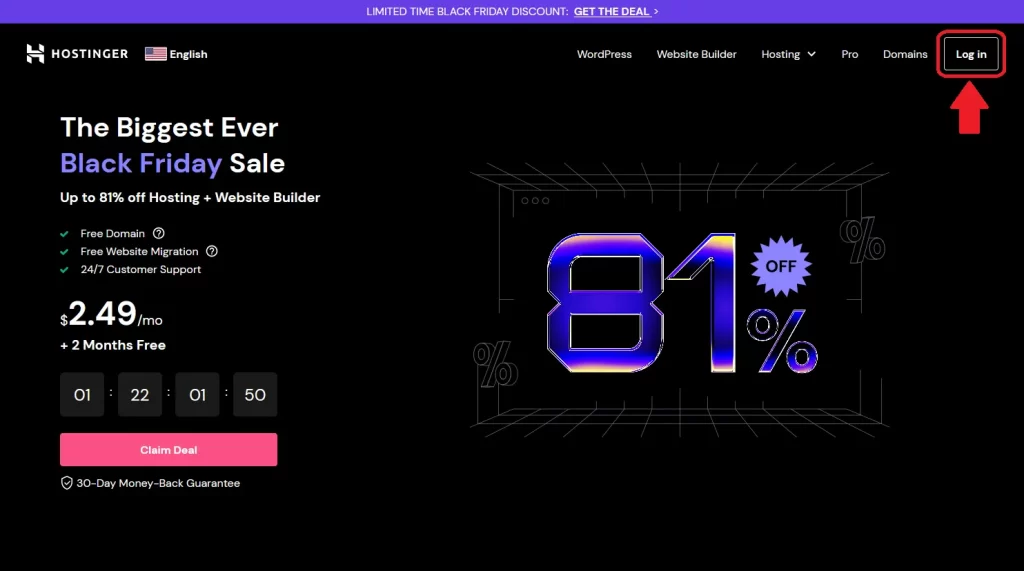
Step 1 – Locate “Log In”
First go to https://hostinger.com – and in the right corner locate “Log in”, and click it
Step 2 – Log into your account
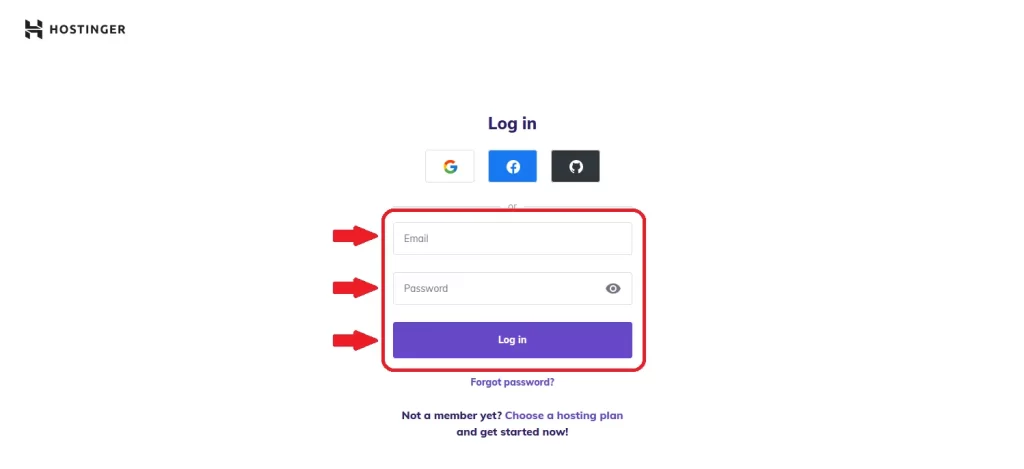
At the login form, enter you email & password – then click the “Log In” button
Step 3 – Locate your domain, and click manage
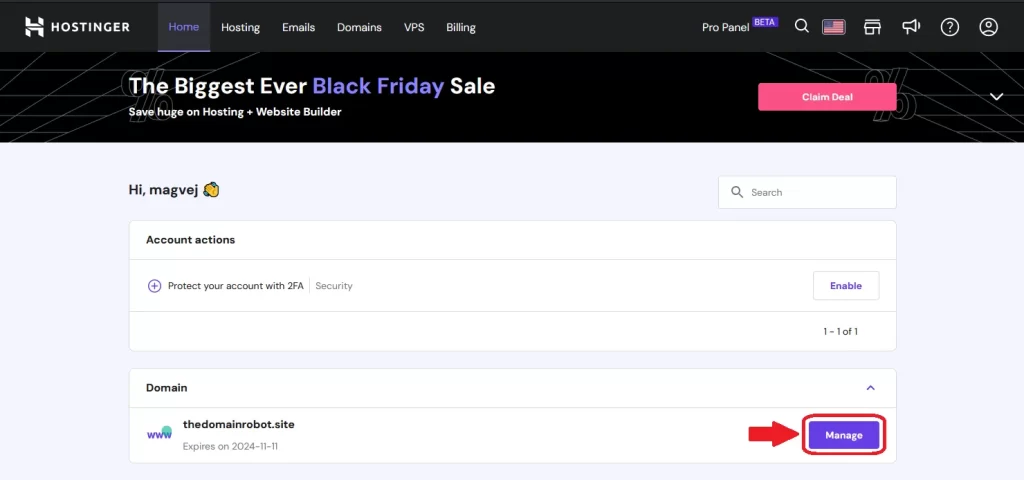
Once logged in, you should be at the hostinger dashboard – from here you should be able to see all domains assosiated with your account. Find the domain you are trying to change nameservers for, and press “Manage”.
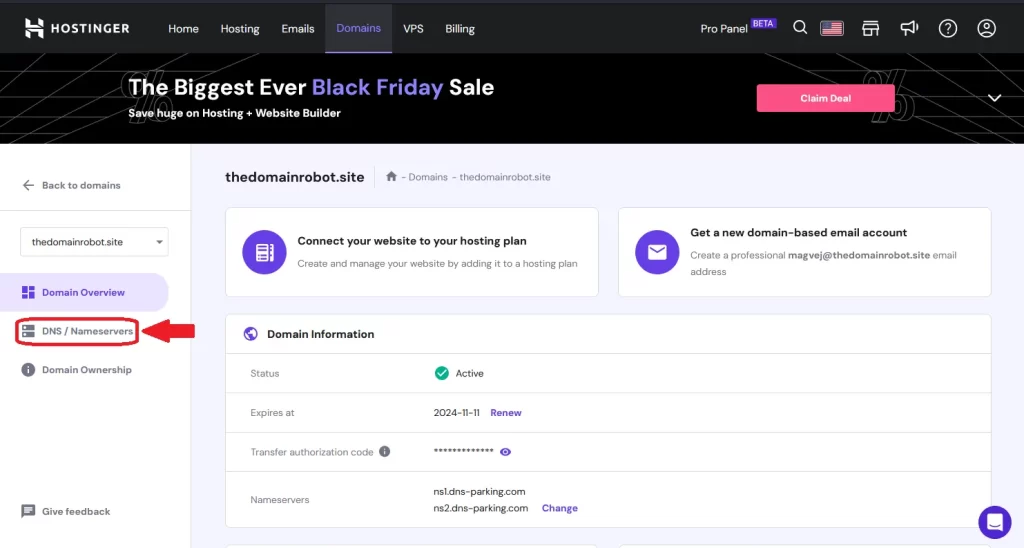
Step 4 – Click “DNS / Nameservers”
You are now in the control panel for the choosen domain. From this control panel, you should be able to do anything, related to your domain.
At the moment we are only interrested in changing nameservers, so find “DNS / Nameservers” in the menu at the left side of your screen, and click it.
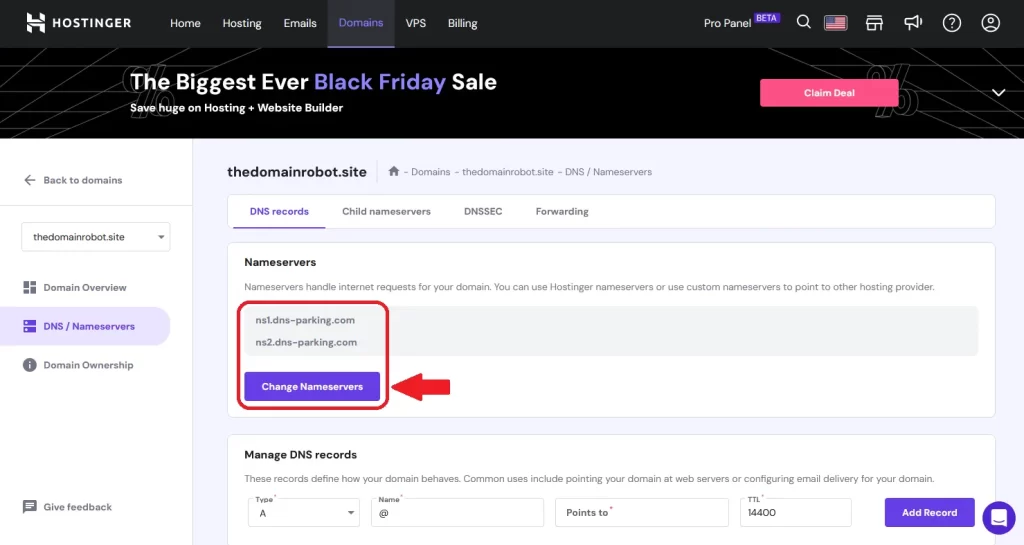
Step 5 – Click “Change nameservers”
To start changing your nameserver, locate and click “Change nameservers”
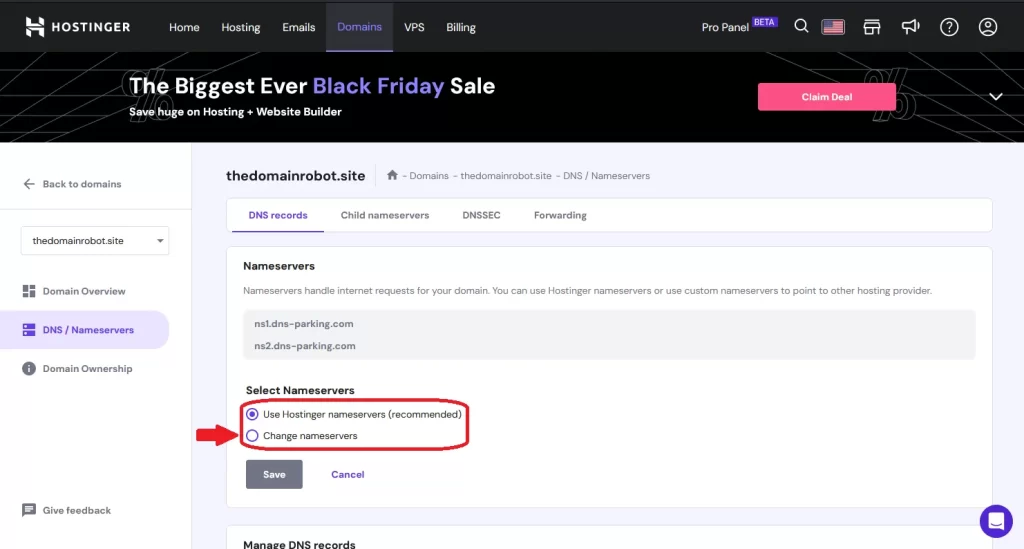
Step 6 – Click “Change nameservers”
You now should have 2 options:
- Use Hostinger nameservers (recommended)
- Change nameservers
Click the “Change nameservers”
Step 7 – Delete nameservers
After pressing “Change nameservers”, 2 input fields should appear – already populated with your current Hostinger nameservers – select the input fields, and delete the text/nameservers
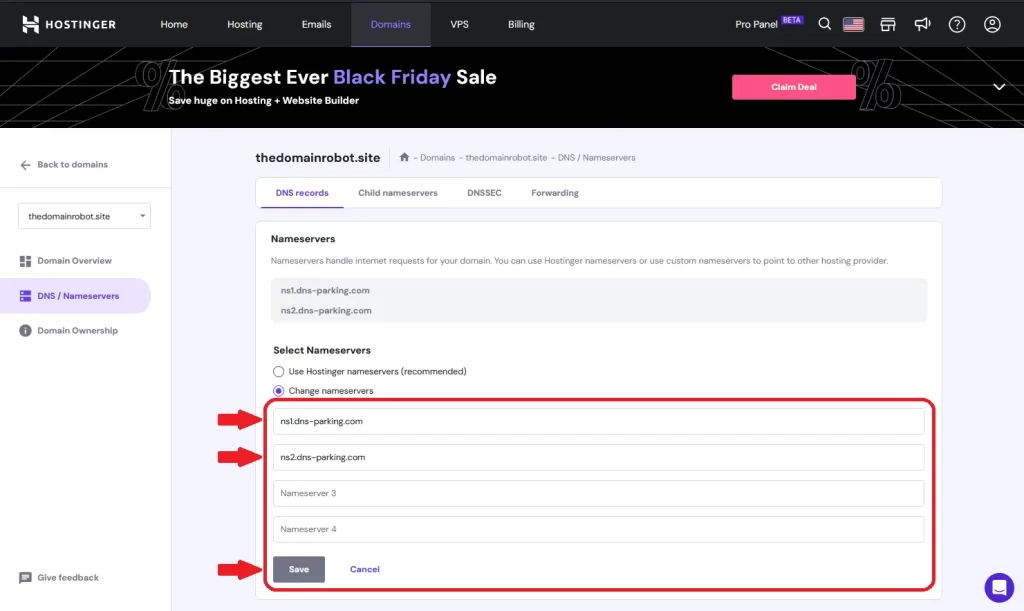
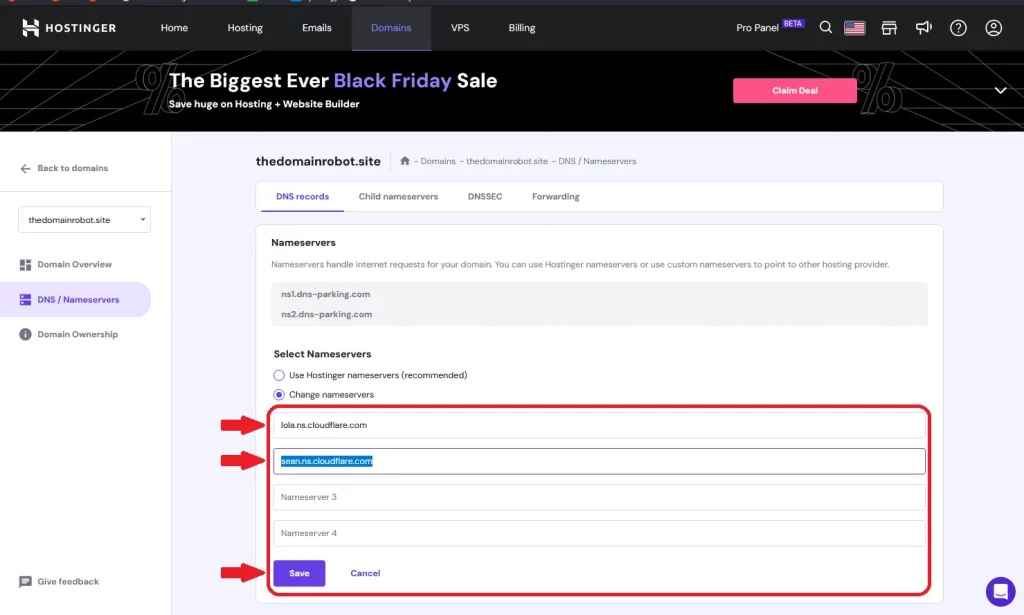
Step 8 – Fill input with your nameservers
After deleting the pre-populated nameservers, fill the input fields, with the nameservers provided by your new DNS provider – and then press save.
Step 9 – Wait
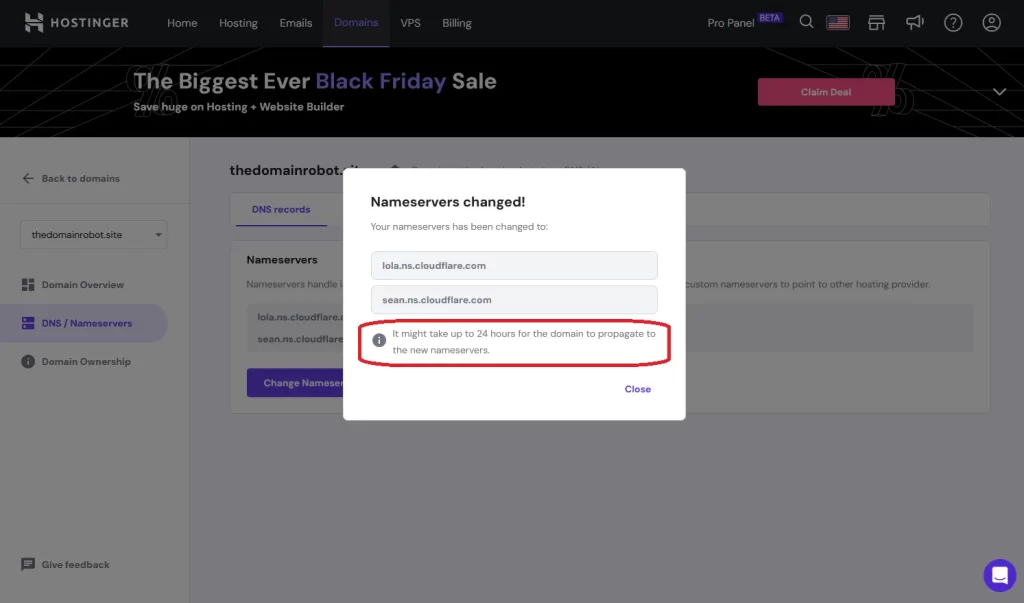
This is by far the most important step, you have to patiently wait. Because of how DNS caching works, changing anything related to your DNS – can take from 10 min to 24 hours to propagate through out all DNS servers around the world. In our experience, you should expect it to take around 1 hour to propagate to most DNS servers around the world, but it is very likely it takes way longer!
But besides the waiting? You have now manage to change your DNS servers, congratulation!
