How to Change Nameservers on GoDaddy
06-11-2023 - GoDaddy.com, GuidesHow to Change Nameservers on GoDaddy
Managing your domain and web hosting can sometimes require a bit of technical knowledge, such as how to change your nameserver. A nameserver is essentially the tool that directs your domain to the server where your website is hosted. There are situations where you may need to change your nameserver, such as when you’re switching web hosts, setting up a new website, or enhancing website speed and performance.
But it can often be hard to figure out how to change stuff like your nameserver, because every domain registrar have a different way of changing it. In this guide we will try to provide a clear, step-by-step instructions How to Change Nameservers on GoDaddy.com
Want to know how you change nameservers, on other domain registrators?
If you’re looking to change your nameservers with other domain registrars, we have compiled a list down below of our guides for other domain registrars.
Step 1 – Sign into your GoDaddy Account.
The very first thing you have to do before doing anything else, is to go to GoDaddy.com and in the right corner press sign in

Step 2 – Find your Domain
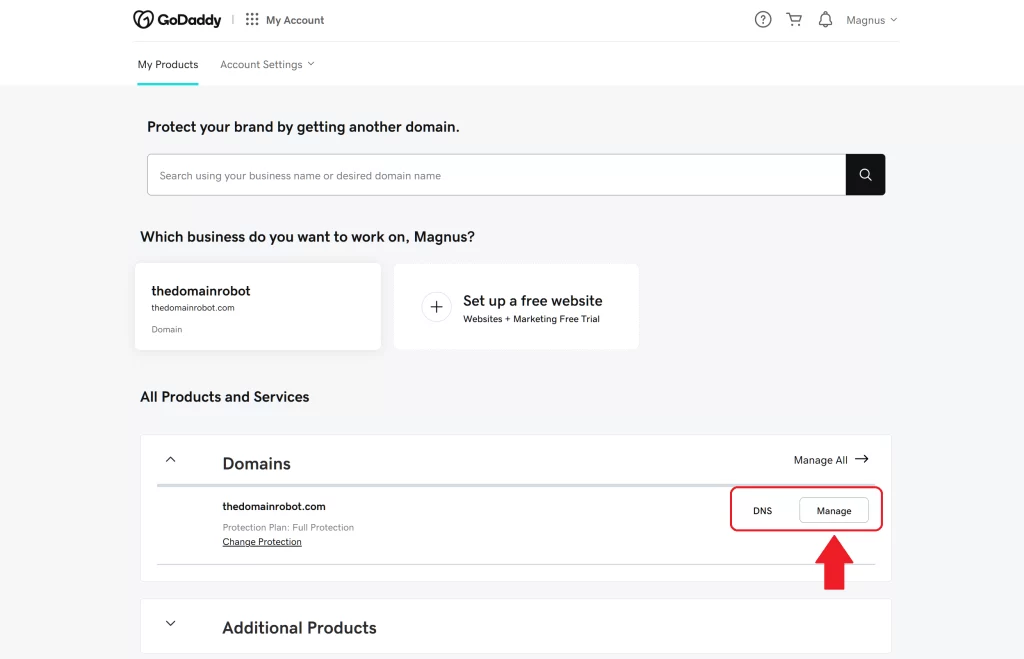
Once you are logged into your GoDaddy account, you should now be on your GoDaddy Product Dashboard. From the dashboard you find the Domain that you desire to change your Nameservers for, and press “Manage”.
Step 3 – Manage domain
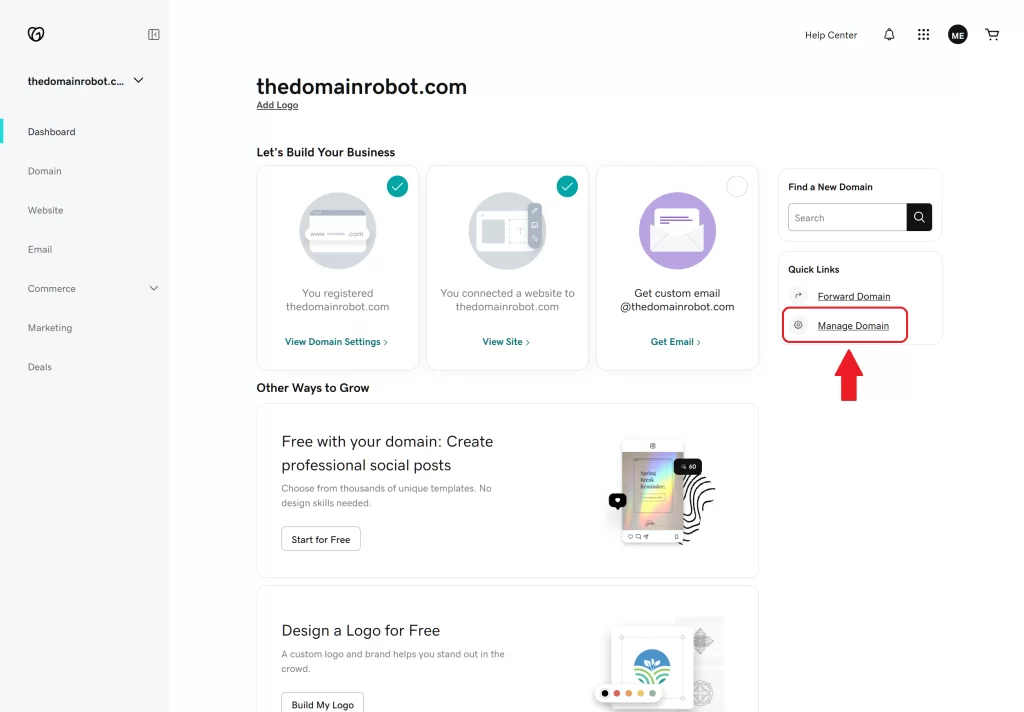
You have now selected a specific domain – you should be on a URL similar to “https://dashboard.godaddy.com/venture?domainName=YOUR-DOMAIN-NAME-HERE.COM“. From here you need to go find the button/link “Manage Domain”.
Step 4 – DNS
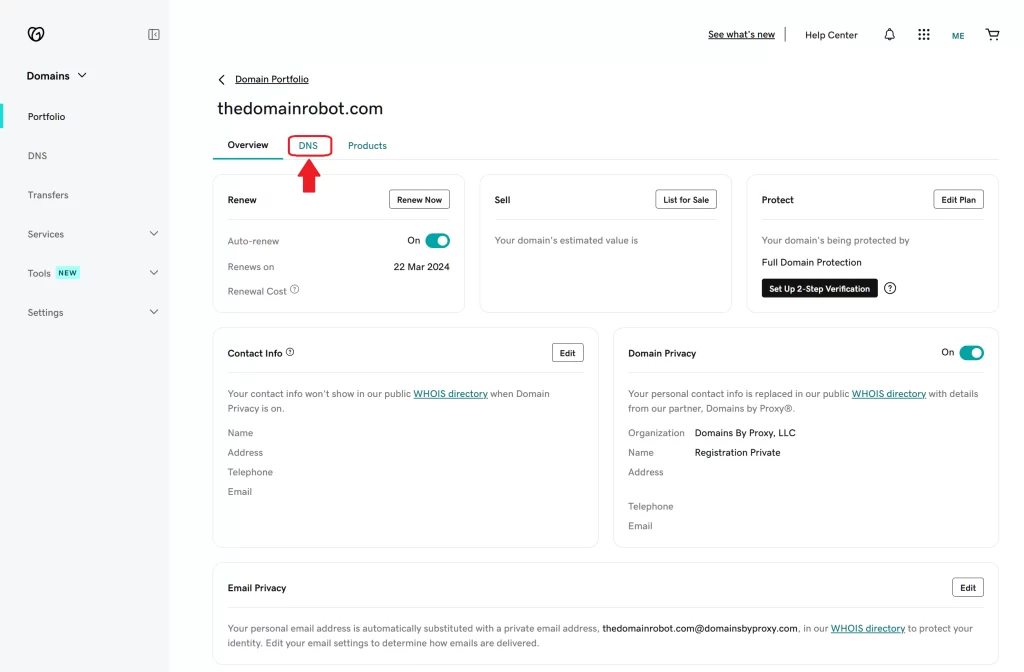
You are now in the dashboard for the specific domain – you should be on a URL similar to “https://dcc.godaddy.com/control/portfolio/YOUR-DOMAIN-NAME-HERE.COM/settings”. From this dashboard you can see and control everything related to the domain in question – like Domain Renewal, Domain Privacy, Contact Information, DNS and so on. You now need to find the Tab named “DNS” and press it to view DNS related information.
Step 5 – Choose “Nameservers”
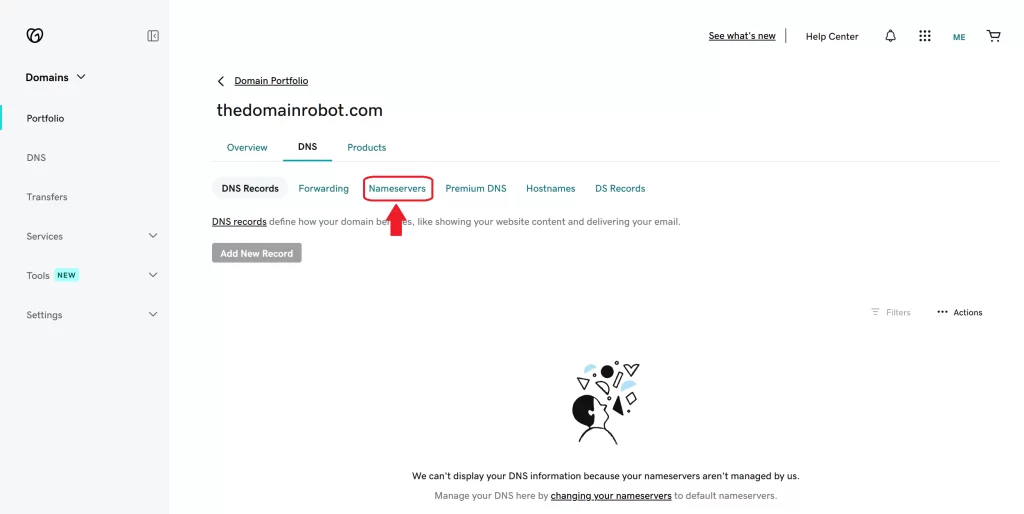
After pressing the DNS tab, a new tabs should appear – find and press the “Nameserver” tab
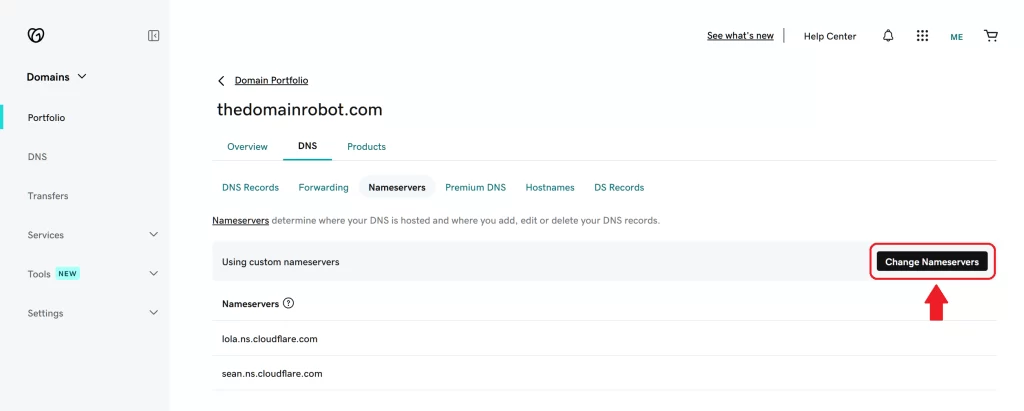
Step 6 – Press change nameservers
In the “Nameserver” subtab, you can see your current registered nameservers – and you also have the ability to change your nameservers from this tab, by pressing “Change Nameservers”
Step 7 – Enter your Nameservers
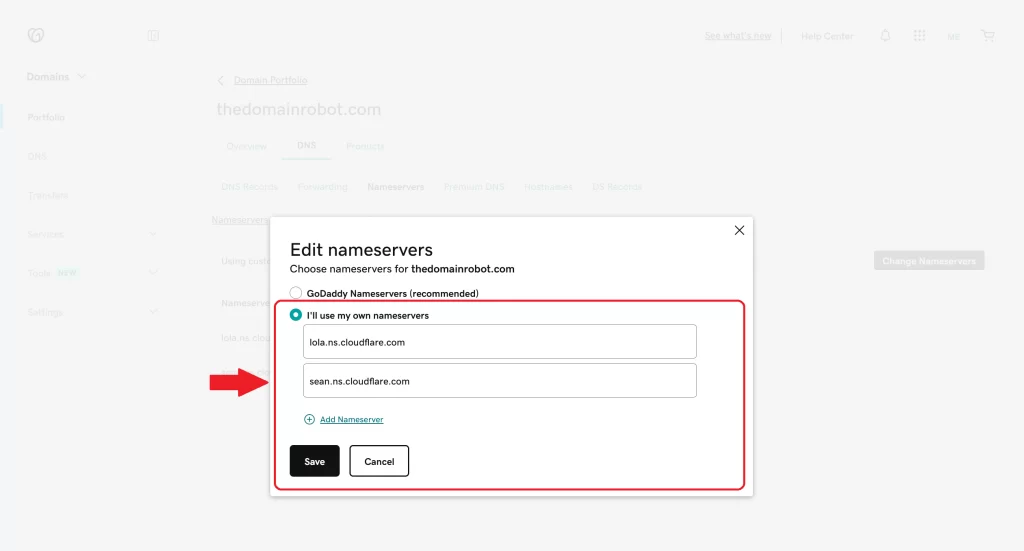
After pressing “Change Nameservers” and popup/modal should now appear on your screen – on this you can now Add/Edit/Delete Nameservers. Do change your Nameservers, you remove the previous Nameservers, and write in your new Nameservers provided by your new DNS provider. When you have entered your new Nameservers, you press “Save”
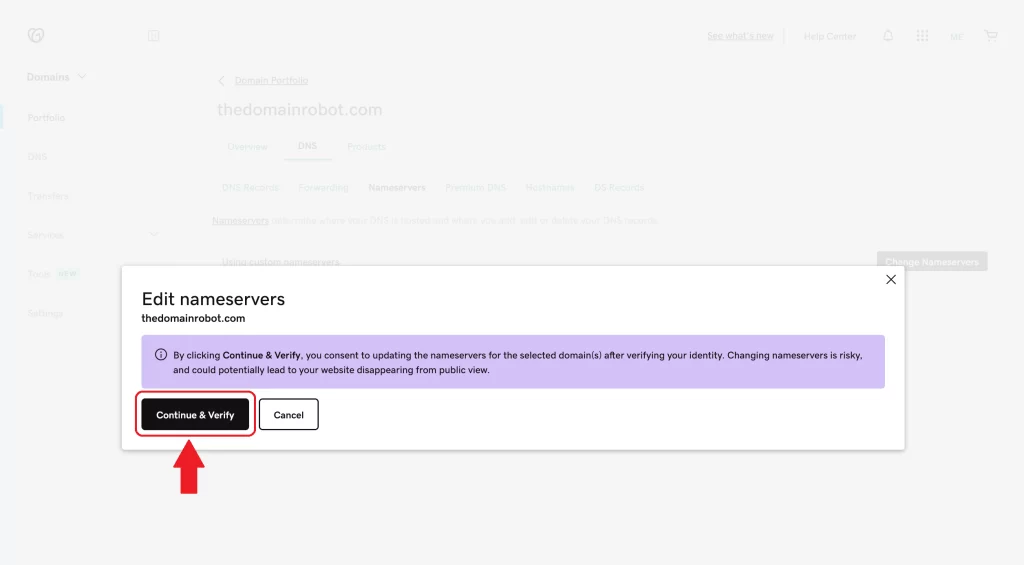
Step 8 – Continue & Verify
A new modal/popup should appear, and as a final step, you have to press “Continue & Verify”
Step 9 – Patiently wait
This is by far the most important step, you have to patiently wait. Because of how DNS caching works, changing anything related to your DNS – can take from 10 min to 24 hours to propagate through out all DNS servers around the world. In our experience, you should expect it to take around 1 hour to propagate to most DNS servers around the world, but it is very likely it takes way longer!
But besides the waiting? You have now manage to change your DNS servers, congratulation!
