How to Enable the Cloudflare Block Country Feature
07-02-2024 - Cloudflare, GuidesAn introduction to Controlling Your Websites Traffic with The Cloudflare Block Country Feature
In the digital age, where controlling who can access your website is not just a matter of preference but often a crucial aspect of online security and compliance. With the Cloudflare block country feature, website administrators now have a robust tool in their arsenal to effectively manage the flow of traffic based on geographic locations.
The Cloudflare geo blocking service is at the forefront of this technology, providing an intuitive way to configure these restrictions directly from your Cloudflare dashboard. This feature prevents users in designated countries from accessing your site, which can be vital for adhering to legal regulations, managing international licensing restrictions, or simply optimizing your network traffic. Additionally, blocking access with Cloudflare’s geo-restrictions can enhance your website’s performance by reducing unwanted traffic that puts a strain on your resources.
Establishing a strategy, using the Cloudflare block country feature is a straightforward process that can be mastered even by those relatively new to website management. In this subsection, we will delve into the details of how to set up Cloudflare block country feature within your Cloudflare account. We’ll walk through the process step by step, ensuring that you’re equipped with all the knowledge you need to make informed decisions about which countries to block. Moreover, we will discuss the potential implications and best practices for implementing Cloudflare geo blocking, ensuring you can navigate the nuances of this powerful feature with confidence.

Geo Blocking Explained
Geo blocking is a method used by website administrators to restrict access to their sites based on the geographic location of the user. With Cloudflare Block Country, this form of restriction is a fundamental feature that allows you to block or allow traffic from specific countries effectively. Employing Cloudflare Geo Blocking ensures that you can filter your website’s visitors according to where they are accessing from, reinforcing security protocols or adhering to regional content distribution laws. This selective access can be crucial for businesses that need to control their online environment, prevent cyber threats, or manage licensing restrictions. Ultimately, Cloudflare’s tools for geo blocking provide a strategic layer of control over website traffic, enhancing both security and operational efficiency.
What Countries to Geo Block?
Deciding which countries to target when setting up Cloudflare Block Country can vary greatly depending on the nature of your website. For a localized website primarily serving one country’s audience, it is often make sense to only permit access predominantly from that nation and perhaps its immediate neighbors. The rationale behind this selective approach is to concentrate resources and ensure a high-quality experience for the local user base. By using Cloudflare Geo Blocking to restrict access from distant countries with little to no relevance to your content or services, you can effectively minimize bot attacks – and unnecessary traffic – that offers little value to your website’s goals.
Conversely, if your website has a global reach, implementing stringent geo blocking rules might not align with your objectives. An international website often benefits from the diverse traffic and the broad audience that comes with it. In this scenario, the Cloudflare geo blocking feature might be employed more strategically, perhaps only to comply with international laws or to block access from regions known for malicious cyber activities. Essentially, the usefulness of geo blocking hinges on a clear understanding of your website’s audience, mission, and regulatory obligations.
Building upon this understanding, it is also essential to consider the cybersecurity landscape. A 2023 study by Netacea revealed that a significant 72% of organizations surveyed experienced bot attacks originating from China, and 66% reported similar threats stemming from Russia. These statistics underscore the potential risks associated with traffic from certain regions and the value of incorporating security intelligence into this decision when thinking about geo blocking. Given this, as a website admin, it may be prudent to strategically deploy Cloudflare Block Country features to mitigate such security risks – and choose to geo block countries where a large percentages of all bot attacks originates from.
How to Enable the Cloudflare Block Country Feature
Our step-by-step guide will take you through the process of configuring this robust tool on the Cloudflare platform, allowing you to restrict access based on user location effectively. Follow along to safeguard your site and tailor visitor access to your specific needs. Stay tuned for a detailed walkthrough to secure your digital presence with precision.
(Step 0 – Setup Cloudflare as your domains DNS)
If your domain is currently not using the Cloudflare DNS – we have made an easy to follow guide, you can find here: “how to setup cloudflare with your domain“.
If your site is already active on Cloudflare, proceed to step 1
Step 1 – Go to Cloudflare.com
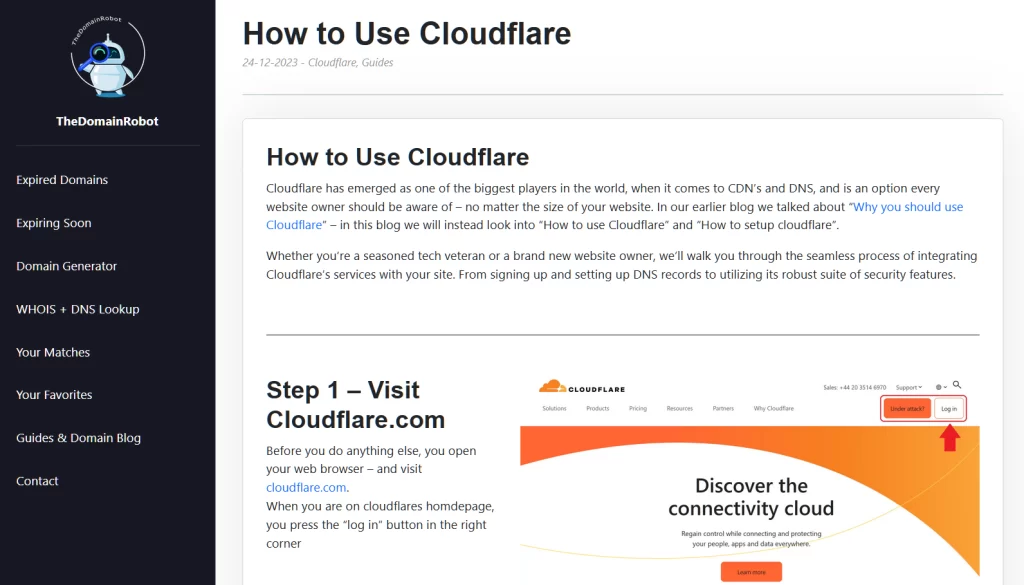
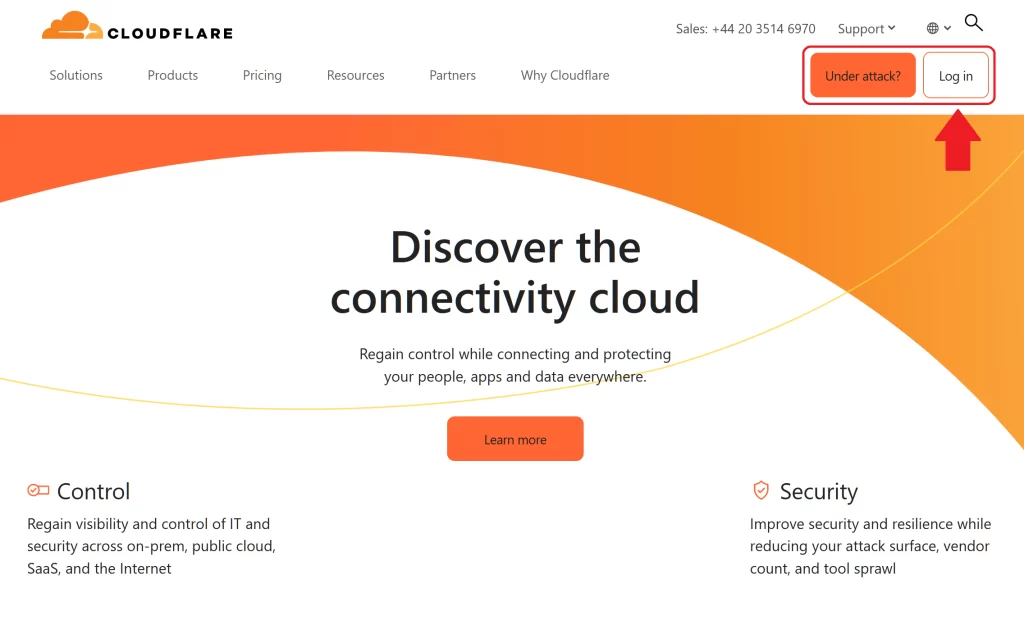
Open your web browser – and visit cloudflare.com.
When you are on cloudflares homdepage, you press the “log in” button in the right corner
Step 2 – Log in to Cloudflare
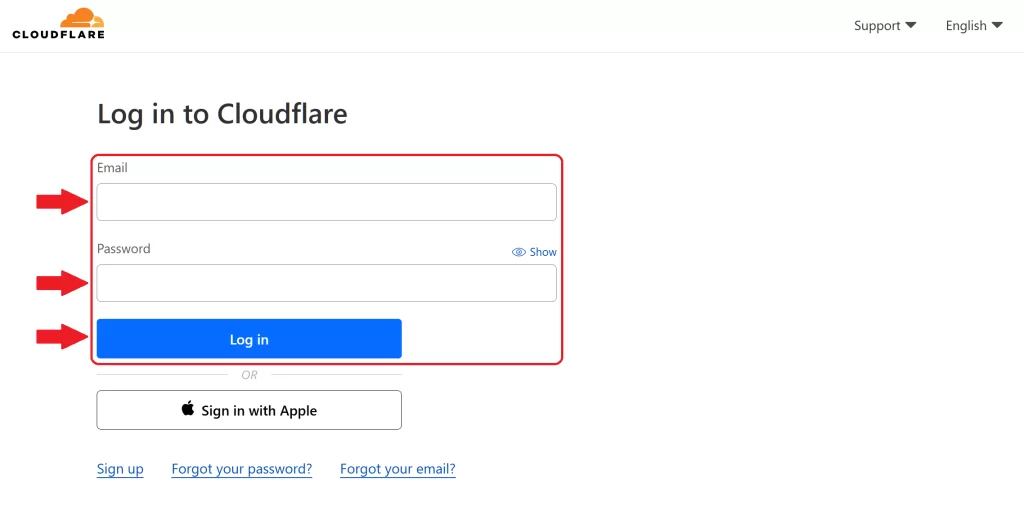
On the login form fill out the email and password for your Cloudflare account – then press the “Log in” button
Step 3 – Go to the Domain Dashboard
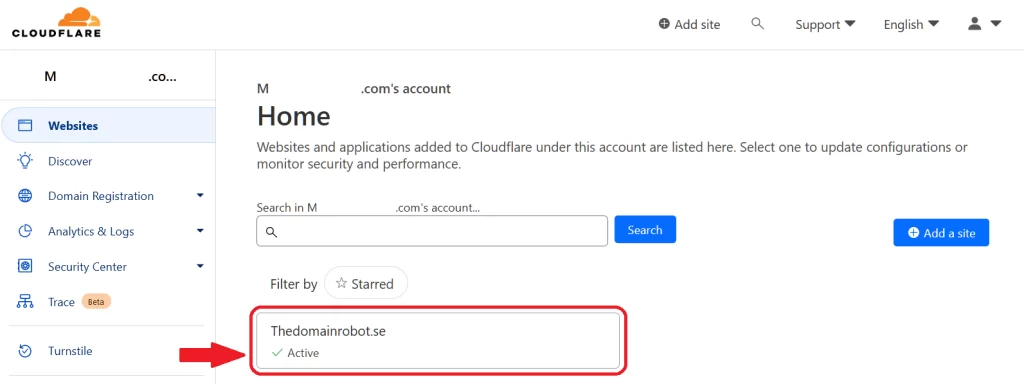
Once in your Cloudflare Dashboard, you want to find your domain – and click it, to proceed to the Domain Dashboard.
Step 4 – Go To Security, WAF
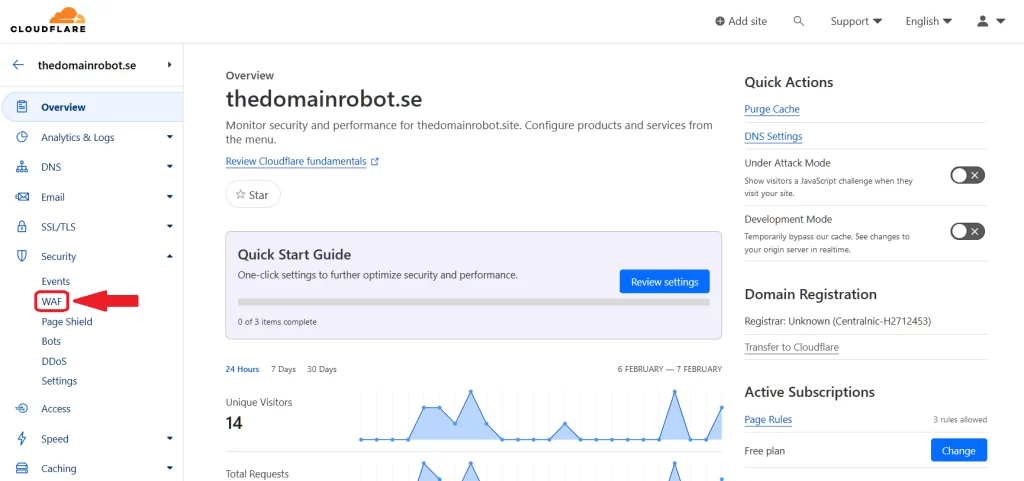
Once in your Domains Dashboard, you want to locate the navigation menu, in the right site – here you wanna find the “Security” menu – and click it. This should open up the sub menu, here you wanna click on “WAF”
Step 5 – Create New WAF rule
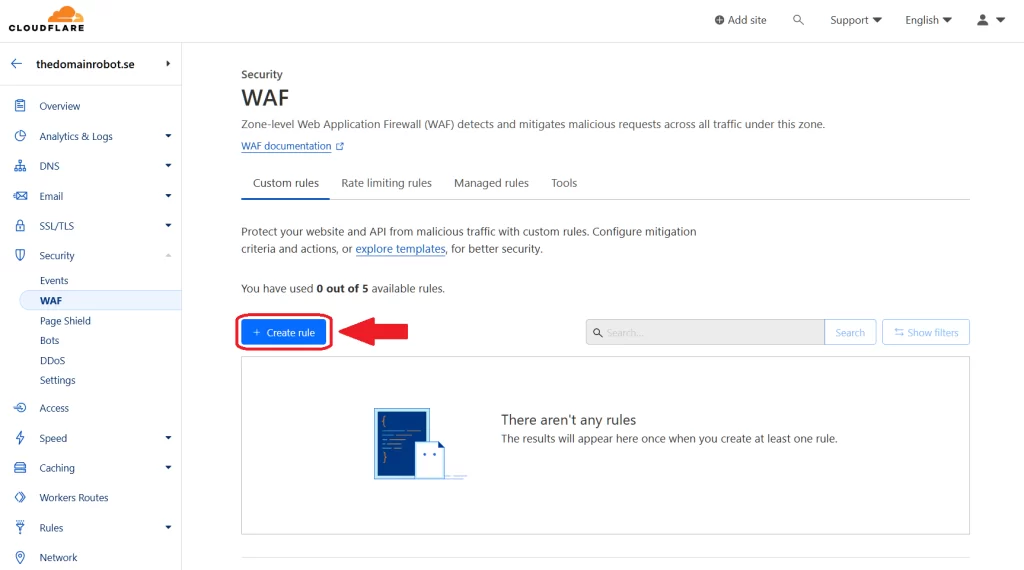
Now on the WAF page, you wanna find the “Create Rule” button – and press it.
Step 6 – Configure your WAF rule
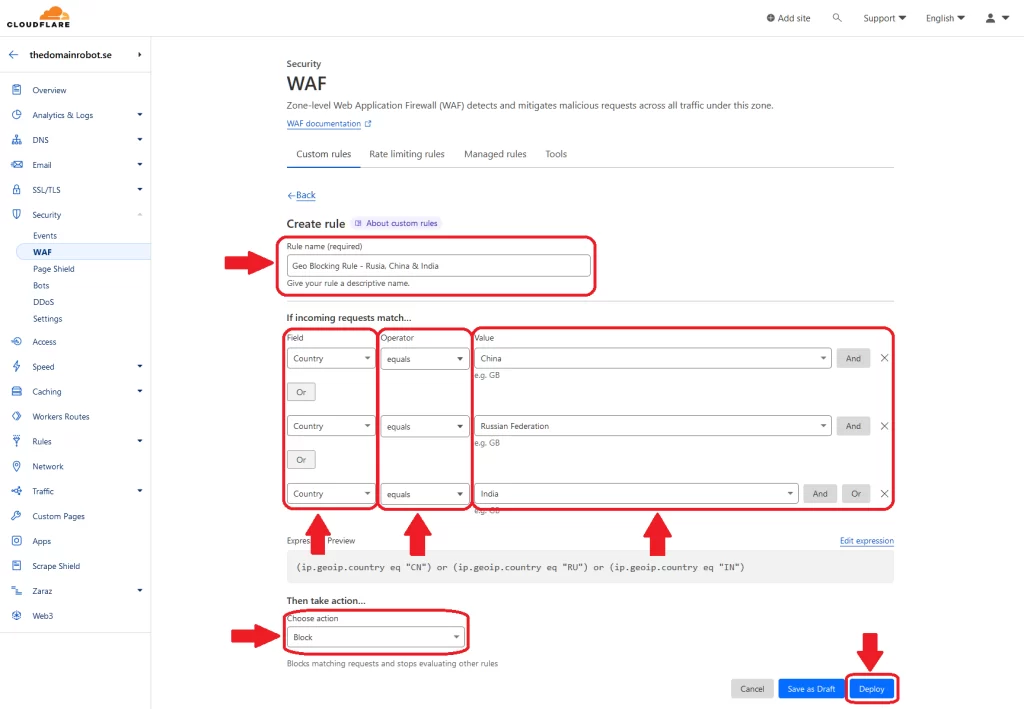
Start by giving your new rule a meaningfull name – a good name, is something that in very few words, explains what the rule is about.
Next you wanna choose what this rule should act upon – in our case we wanna geo block certain countries.
In the Field dropdown menu, select “Country“.
In the Operator dropdown menu, select “Equal“.
In the Value dropdown menu, select “[The country you wish to block]”.
Next you wanna find choose an action, for geo blocking – you wanna select “Block” on the dropdown menu.
Lastly, you wanna press “Deploy” to finalize your new WAF rule
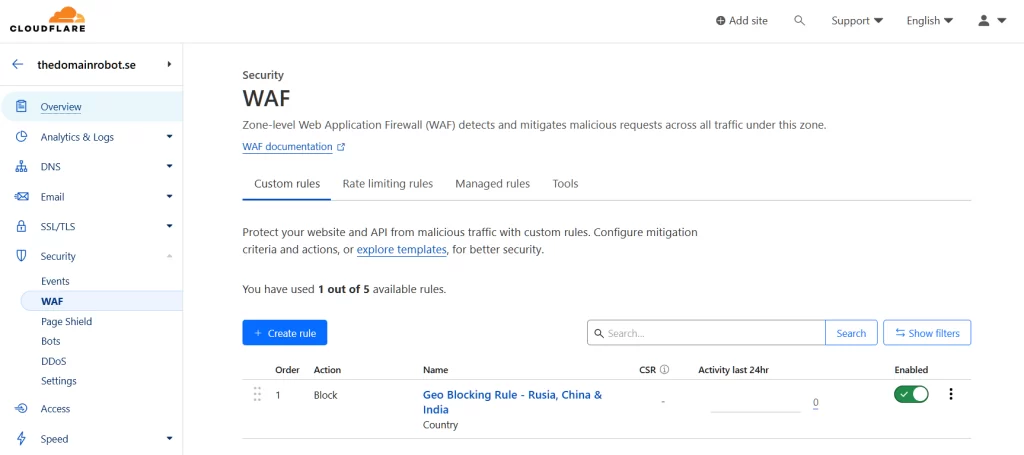
Step 7 – Congratulation, you are now Geo Blocking
Your new geo blocking rule should now be active – so people from these regions/countries should now be drastically decreased.
BUT wait! since it might not be obvious to everybody – enabling this WAF rule in the Cloudflare Dashboard, only work if you use the Cloudflare proxy IP’s aswell. But this should be something everybody using Cloudflare should do by default, but in case does not already use this, and you dont know how to turn on Cloudflare proxies – we made a guide to help you – “How to turn on Cloudflare proxies“
Our other Cloudflare Related Guides
When you have managed to If you’re eager to deepen your understanding of Cloudflare and its suite of tools, you’ll find our archive of Cloudflare-related guides invaluable. From setting up your first domain to optimizing website performance with Cloudflare’s caching options, our comprehensive tutorials are here to assist. Don’t miss out on the wealth of knowledge we’ve compiled to help you make the most of Cloudflare’s offerings. You can explore our other guides here:
- How to Use Cloudflare for a Turbocharged Website
- Your Ultimate Guide to Cloudflare Domain Redirect
- How to Turn on The Free Cloudflare Proxy Service
- Secure your website with the Free Cloudflare Bot Fight Mode
- Secure Your Assets, with Cloudflare Hotlink Protection
- How to Instantly Purge Cloudflare Cache
- How to Set Cloudflare Browser Cache TTL
- How to Redirect an Expired Domain with Cloudflare
- How to Enable Cloudflare Compression to Speed Up Your Site
- How to make Cloudflare Redirect HTTP to HTTPS
