How to Instantly Purge Cloudflare Cache
29-12-2023 - Cloudflare, GuidesHow to instantly purge Cloudflare cache
In today’s fast-paced online environment, ensuring that your website displays the most recent content is vital for a good user experience. A Cloudflare cache purge is an essential tool that enables website administrators to remove outdated or changed content from Cloudflare’s servers. When you initiate a purge cache Cloudflare action, it forces the system to fetch the latest version of your site’s content, allowing for immediate updates and corrections to be seen by your visitors.
Performing a purge Cloudflare cache operation is particularly important after making significant changes to your website. Whether it’s a design overhaul, content update, or critical fix, this process guarantees that no visitor is left with an outdated view. It also helps in maintaining optimal performance by clearing space for updated resources, which is especially significant when dealing with interactive or frequently updated websites.
This is because when, your browser, the server or the edge-servers cachces content – a TTL (Time-To-Live) value are appended to the content. The TTL value is basicly a way to tell, when it expires and should be fetched again – but sometimes these TTL, can be many hours or days. So clearing, or purging Cloudflare’s cache is a critical step towards ensuring that updates to your website are reflected promptly to your visitors.
So What Does it Mean to Purge Cloudflare Cache?
To purge Cloudflare cache means to clear out stored copies of your web content that reside on Cloudflare’s global network of servers – this network, also known as a content delivery network (CDN), keeps cached versions of your website’s pages to deliver them more quickly to users around the world. So when you perform a Cloudflare cache purge, you’re instructing Cloudflare to eliminate these saved versions so that the next time a user accesses your site, Cloudflare will retrieve and store the most updated content from your server.
When you update your website—maybe fixing a mistake or adding a new picture – you’ll want visitors to see the latest version – and that’s when you’d use the Cloudflare cache purge. It’s like telling Cloudflare, “Hey, forget what you’ve stored, let’s start fresh.” this way, anyone visiting your site gets the new, updated content, not the old stuff. Knowing how to purge the Cloudflare cache lets you make sure your website is always showing the most current information.
How to Purge Cloudflare Cache
Ready to update your website with the latest changes? Great! In the upcoming guide, we’ll walk you through the quick and easy steps to clear your website’s stored data on Cloudflare. This ensures that all your visitors see your newest updates immediately. Don’t worry, there’s no tech expertise required, and we won’t be using any complicated jargon – so just follow along, and your site will be refreshed in no time.
(Step 0 – Setup Cloudflare as your domains DNS)
If your domain is currently not using the Cloudflare DNS – we have made an easy to follow guide, you can find here: “how to setup cloudflare with your domain“.
If your site is already active on Cloudflare, proceed to step 1
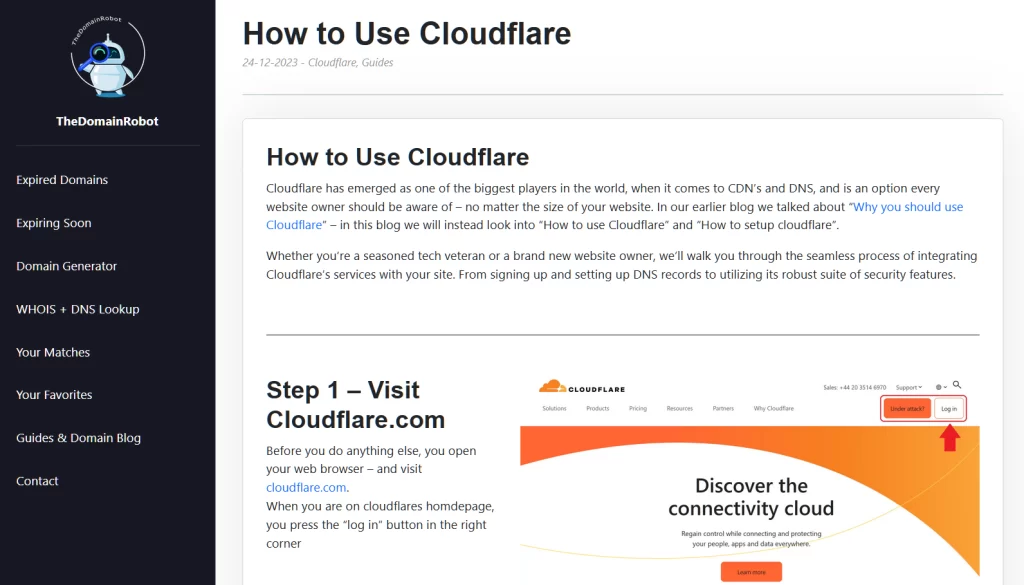

Step 1 – Go to Cloudflare.com
Open your web browser – and visit cloudflare.com.
When you are on cloudflares homdepage, you press the “log in” button in the right corner
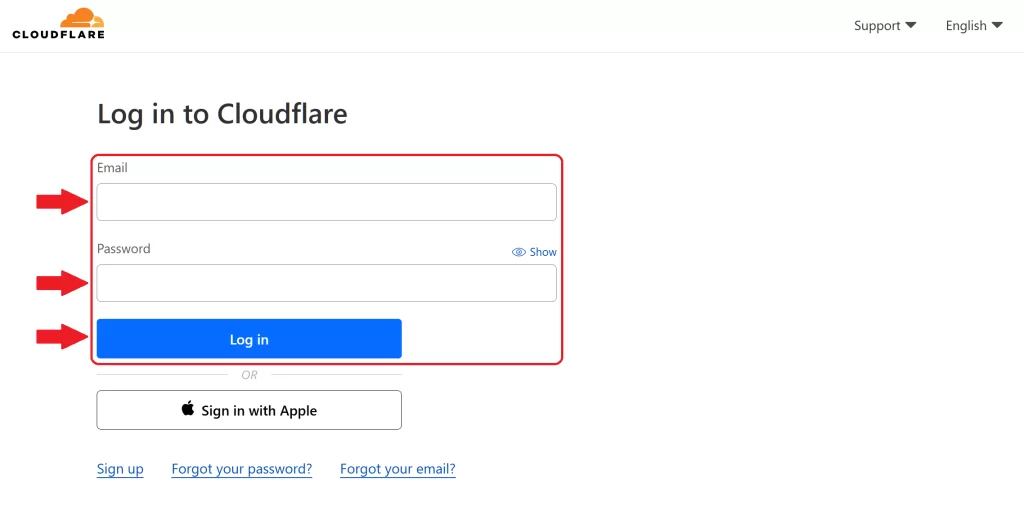
Step 2 – Log in to Cloudflare
On the login form fill out the email and password for your Cloudflare account – then press the “Log in” button
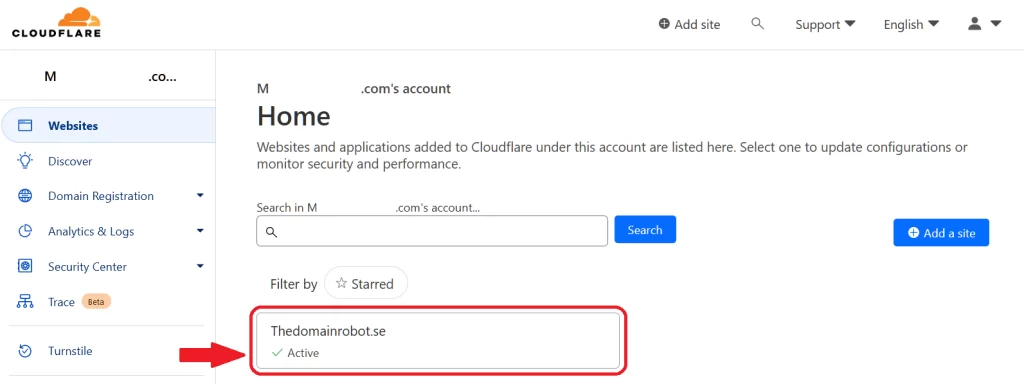
Step 3 – Go to your Domain Dashboard
Once in your Cloudflare Dashboard, find your domain – and click it it.
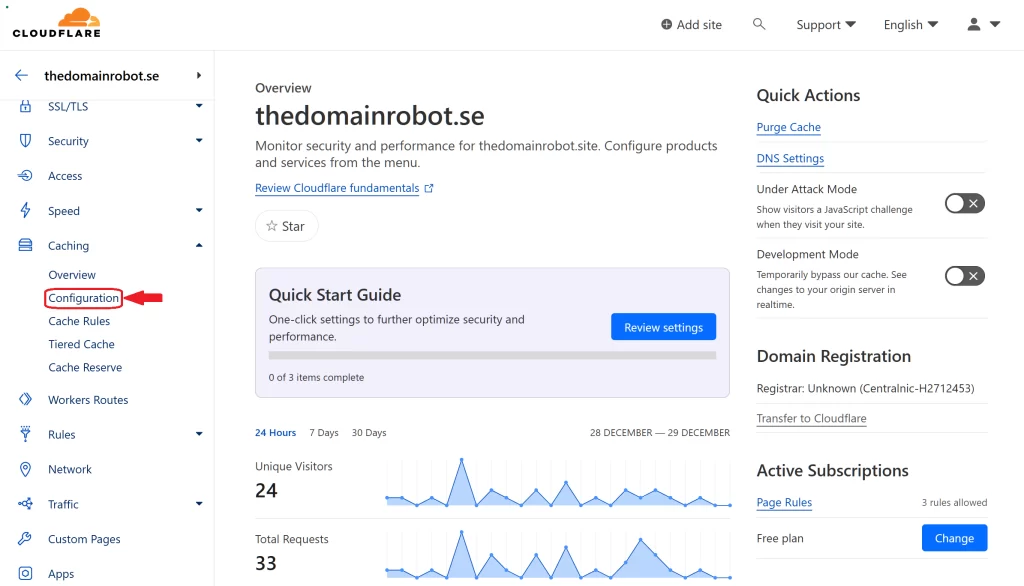
Step 4 – Go to Caching, configuration
In the left navigation panel, you wanna find the Menu “Caching”, and press it – now click the “Configuration” link.
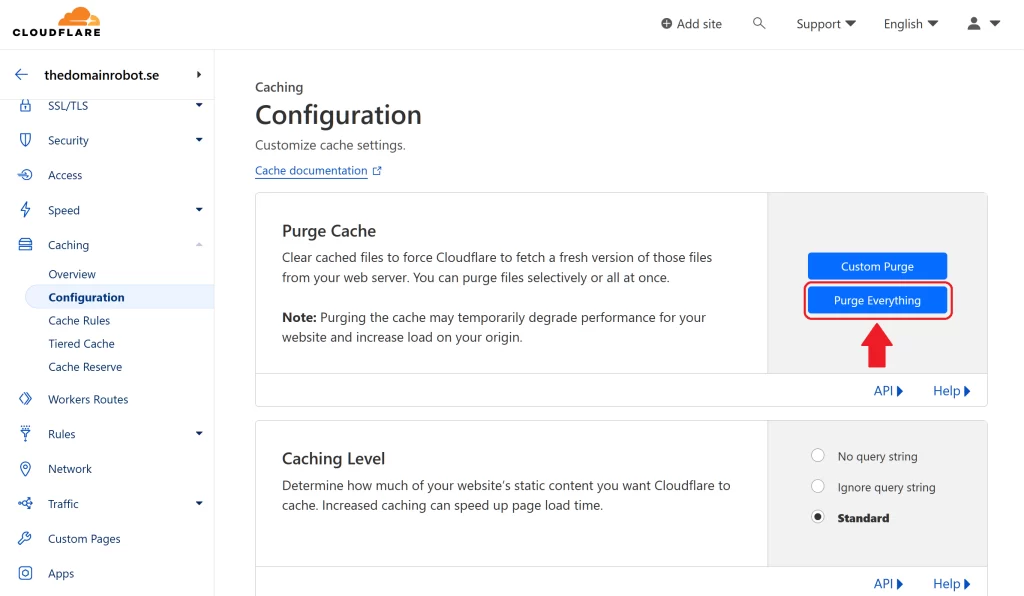
Step 5 – Purge Cloudflare Cache
You should now be on the Caching, Configuration page. Find the “Purge-Cache” in the top of your page – in this box, find the “Purge Everything” button, and click it.
Step 6 – Confirm cache purge
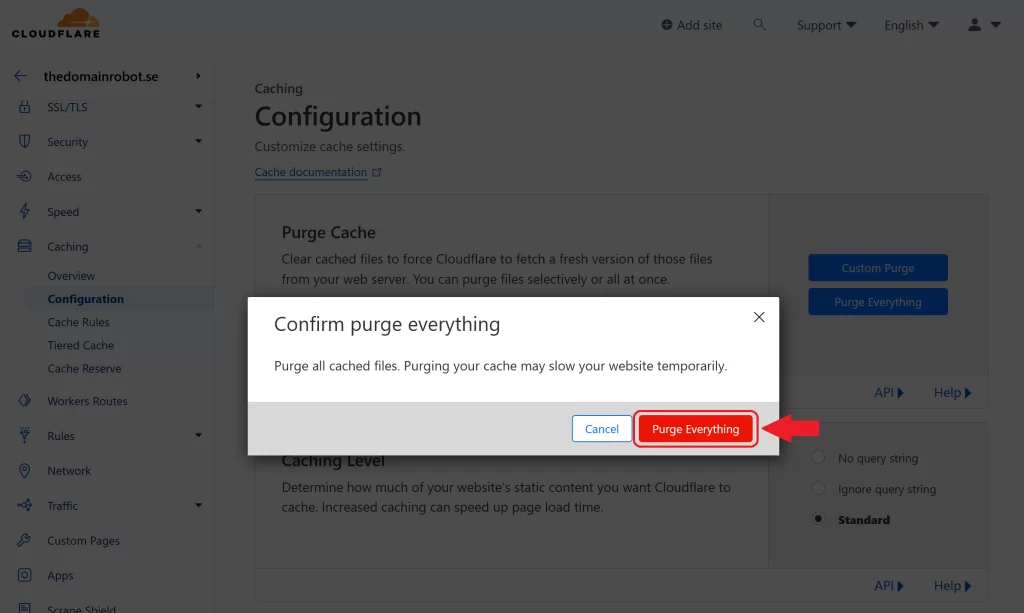
Cloudflare will ask you to confirm you want to purge all the content/assets they have cached that is used on your site.
Confirm by, pressing the red “Purge Everything” button.
Do note the text that says “Purging your cache may slow your website temporarily” – doesn’t mean that the server your website is hosted on will suddenly get slower. It refers to the fact that, instead of cloudflare servering your content from edge-servers, the first time content is loader after a cache purge – cloudflare will have to fetch it from your web host, instead of using the cached content they have on their edge-servers!
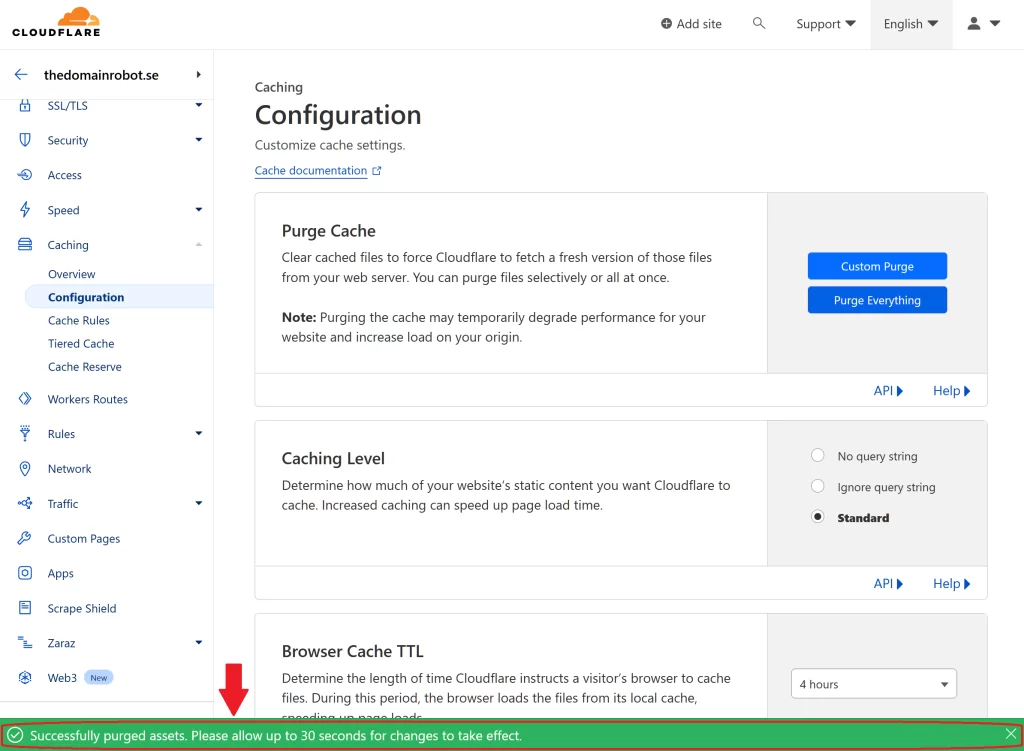
Step 7 – Wait patiently
As noted by the message from Cloudflare – for a full purge of everything, it can takes around 30 seconds to complete – so you just have to wait a little, before any updates will be reflected in your content
Our other Cloudflare Related Guides
When you have managed to If you’re eager to deepen your understanding of Cloudflare and its suite of tools, you’ll find our archive of Cloudflare-related guides invaluable. From setting up your first domain to optimizing website performance with Cloudflare’s caching options, our comprehensive tutorials are here to assist. Don’t miss out on the wealth of knowledge we’ve compiled to help you make the most of Cloudflare’s offerings. You can explore our other guides here:
- How to Use Cloudflare for a Turbocharged Website
- Your Ultimate Guide to Cloudflare Domain Redirect
- How to Turn on The Free Cloudflare Proxy Service
- Secure your website with the Free Cloudflare Bot Fight Mode
- Secure Your Assets, with Cloudflare Hotlink Protection
- How to Set Cloudflare Browser Cache TTL
- How to Redirect an Expired Domain with Cloudflare
- How to Enable Cloudflare Compression to Speed Up Your Site
- How to Enable Auto Cloudflare Minify for Free Performance
- How to Enable the Cloudflare Block Country Feature
