How to Use Cloudflare for a Turbocharged Website
24-12-2023 - Cloudflare, GuidesIntroduction to How to Use Cloudflare DNS and How to Use Cloudflare CDN
Welcome to our comprehensive step-by-step guide on how to use Cloudflare, a leading platform known for enhancing website performance and security. Are you looking for a way to accelerate your website and protect it against a range of threats without spending a fortune? You’re in the right place to discover how leveraging Cloudflare’s robust Content Delivery Network (CDN) and Domain Name System (DNS) services can transform the way you manage your online presence.
In this deep dive into how to use Cloudflare CDN, we’ll walk you through the fundamentals of integrating their network to serve your content faster and more efficiently to users across the globe. Cloudflare’s CDN minimizes latency by caching content and distributing it across multiple servers worldwide, ensuring that your visitors always have rapid access to your website regardless of their physical location.
Moving beyond just swift content delivery, we’ll also guide you on how to use Cloudflare DNS, a core component that maps your domain name to the IP address of your website. This not only enhances the experience for your users but also offers an additional layer of security by protecting against malicious activities like Distributed Denial of Service (DDoS) attacks.
Whether you’re a small business owner, a blogger, or an enterprise-level web administrator, understanding how to harness the power of Cloudflare can drastically improve your website’s loading times, bolster security, and provide a seamless experience for your audience. So let’s get started and unlock the full potential of your website with Cloudflare!
How to Setup Cloudflare
Having navigated the preliminary steps of embracing Cloudflare’s tools for your website, you now arrive at a crucial chapter in your quest for excellence: How to setup Cloudflare. This segment is dedicated to demystifying the Cloudflare setup process, ensuring that you can confidently enhance your site with the robust features that Cloudflare offers. Understanding the nuances of how to setup Cloudflare DNS is particularly important, as it is the bedrock upon which your site’s traffic routing and protection are built. A properly configured DNS ensures that your users reach your site effectively and securely.
In the following section, you’ll find an easy-to-follow, step-by-step guide that will lead you through the entire Cloudflare setup process. From creating your Cloudflare account to configuring your DNS settings, we’ve distilled each task into manageable steps, ensuring that you can implement Cloudflare’s suite of optimizations without hassle.
Step 1 – Visit Cloudflare.com
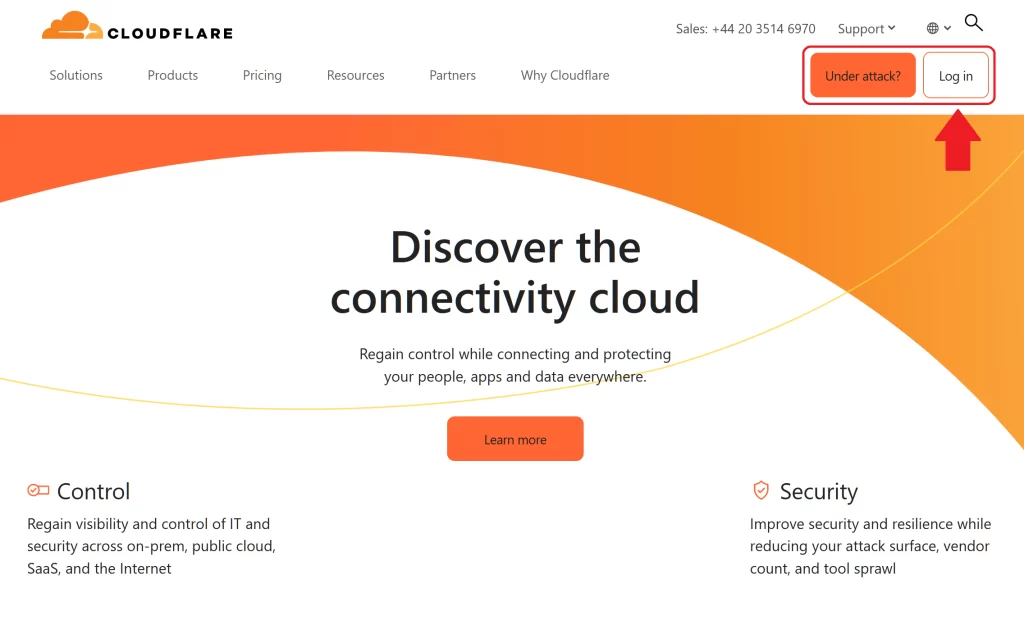
Before you do anything else, you open your web browser – and visit cloudflare.com.
When you are on cloudflares homdepage, you press the “log in” button in the right corner
Step 2 – Go to sign up (or login)
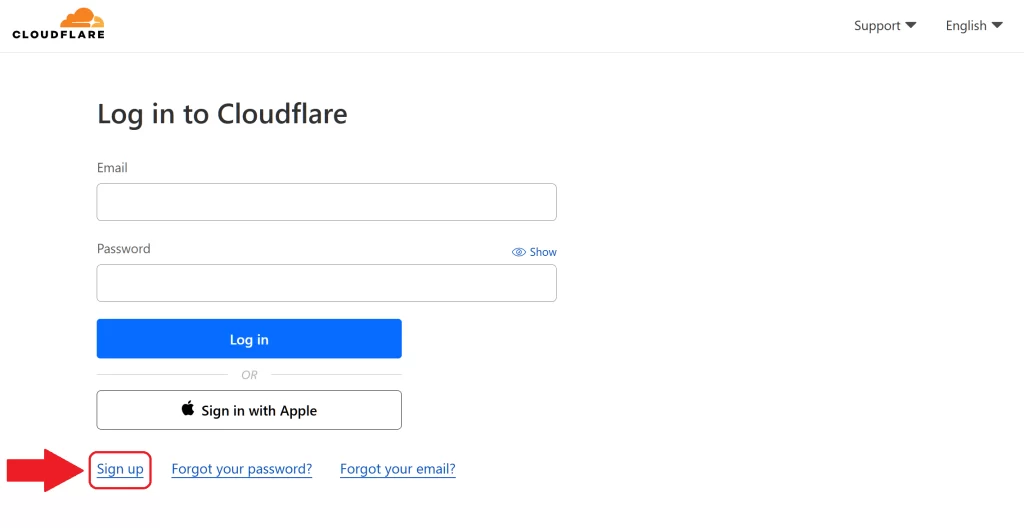
If you are already have an Cloudflare account, you just Log in with your email/password – and proceed to step 7.
If you on the other hand don’t already have a cloudflare account, press the “sign up” link.
Step 3 – Fill out sign up info
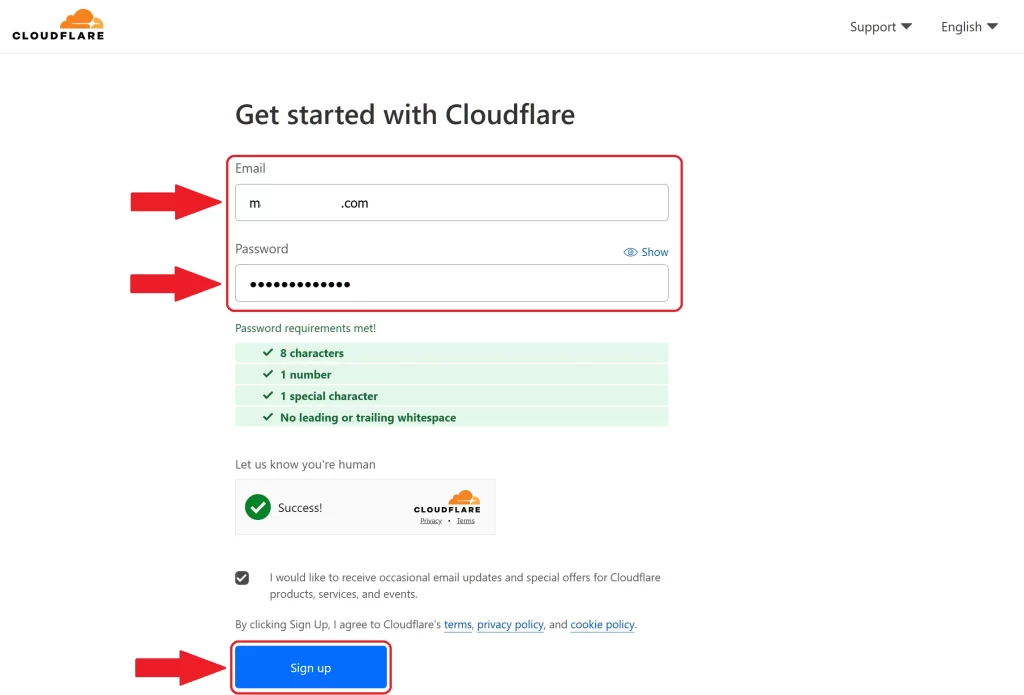
Fill out the Email field, with your email – and a valid password, that meet the password requirements – then press the “Sign up” button

Step 4 – Add Site
After signing up with a Cloudflare account, you should now be logged in – from here you press the “Add Site” link in the top of your page
Step 5 – Enter Domain
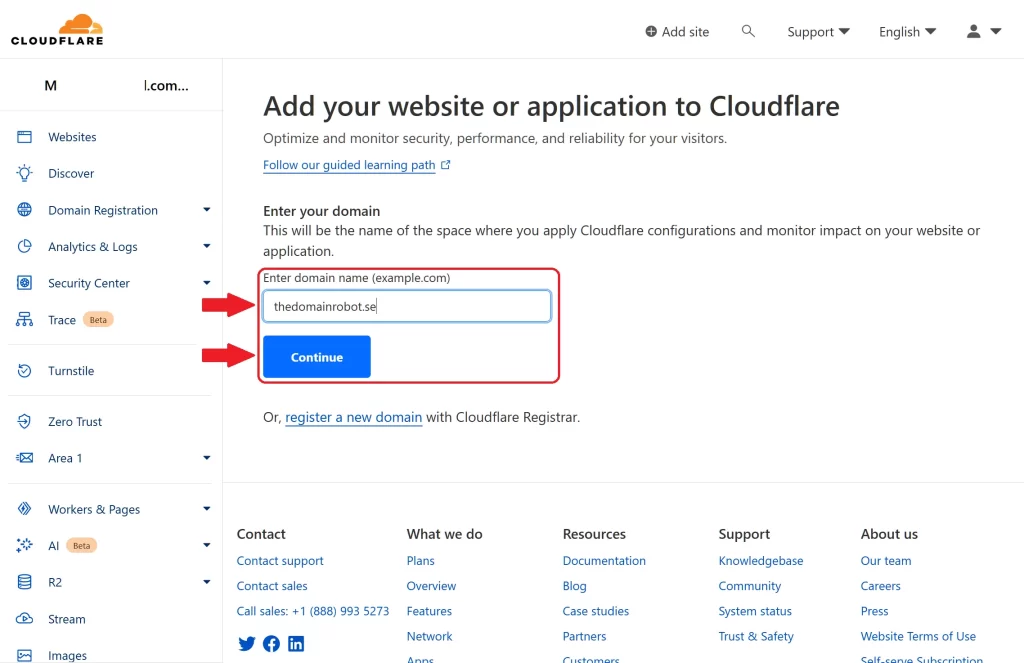
Enter the domain you wish to move to Cloudflare, and press the “Continue” button
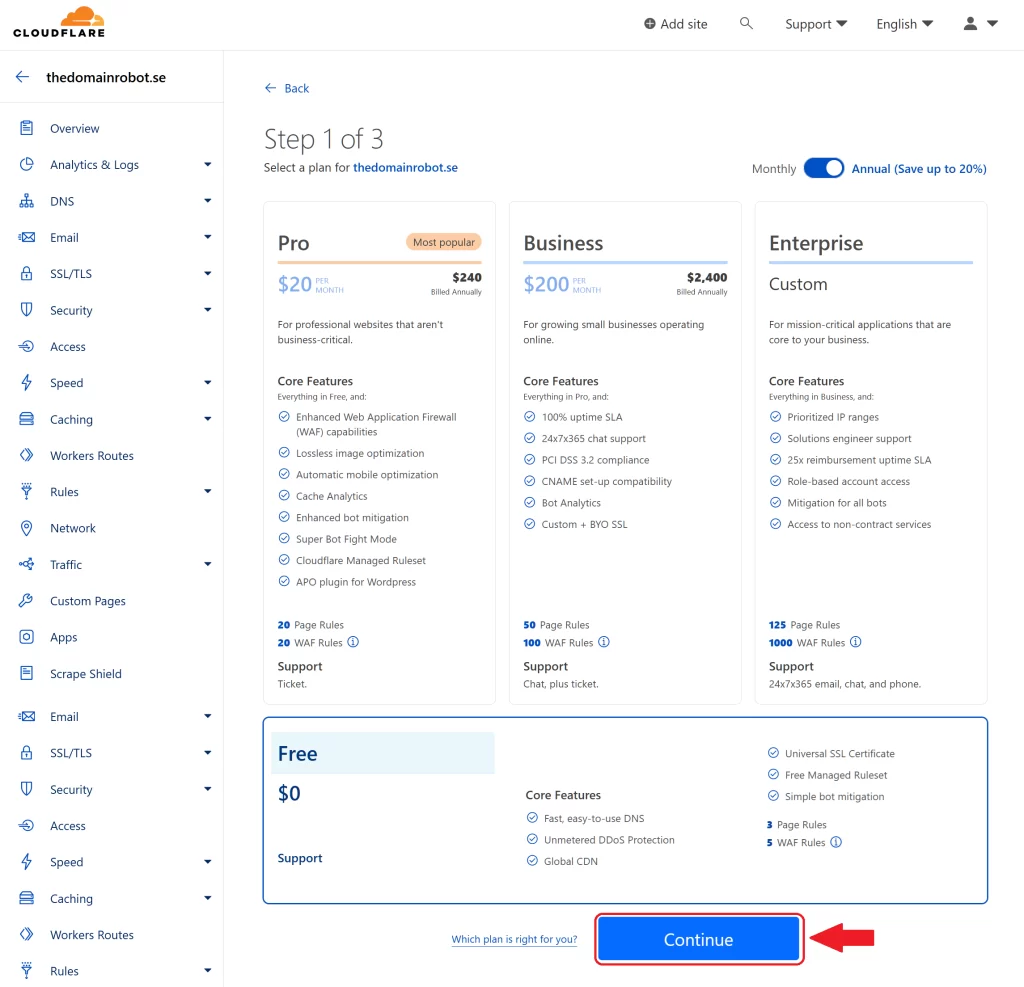
Step 6 – Select your plan
You should now be able to see a couple of different options, in regards to the plan you want to use with your domain. Unless you have a website with very heavy trafic, or very special needs – Cloudflare’s free tier plan, offers everything you need.
Select your plan,. and then press the “Continue” button.
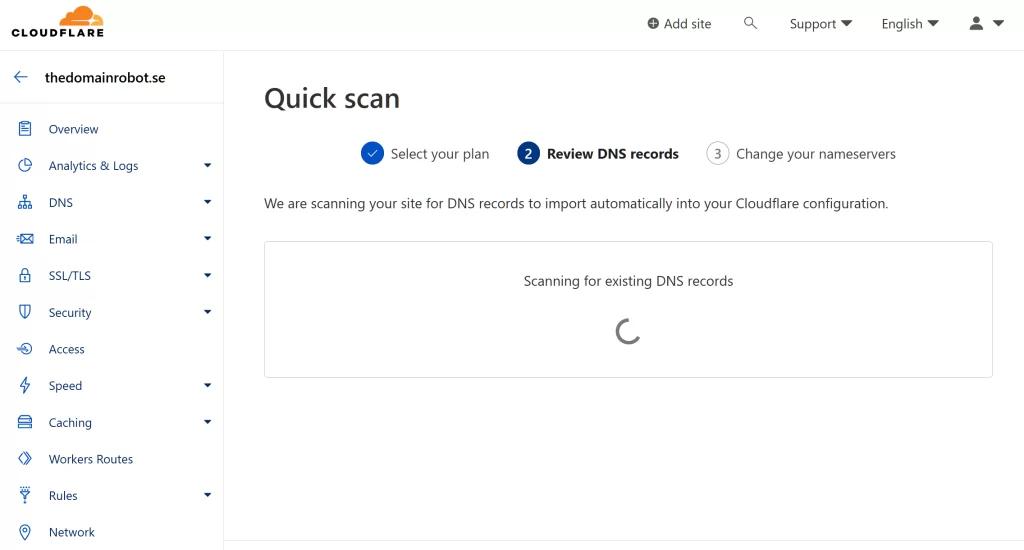
Step 7 – Wait for cloudflare to fetch your DNS
Cloudflare will automaticly fetch all your DNS records from your current DNS provider – so the transfer between the 2 are super smooth and easy!.
It normally takes Cloudflare 30-40 seconds to fetch all your current DNS records, and they will be displayed after – so wait patiently. If your domain is brand new, you might not have setup any DNS records yet, then the DNS record list will be empty.
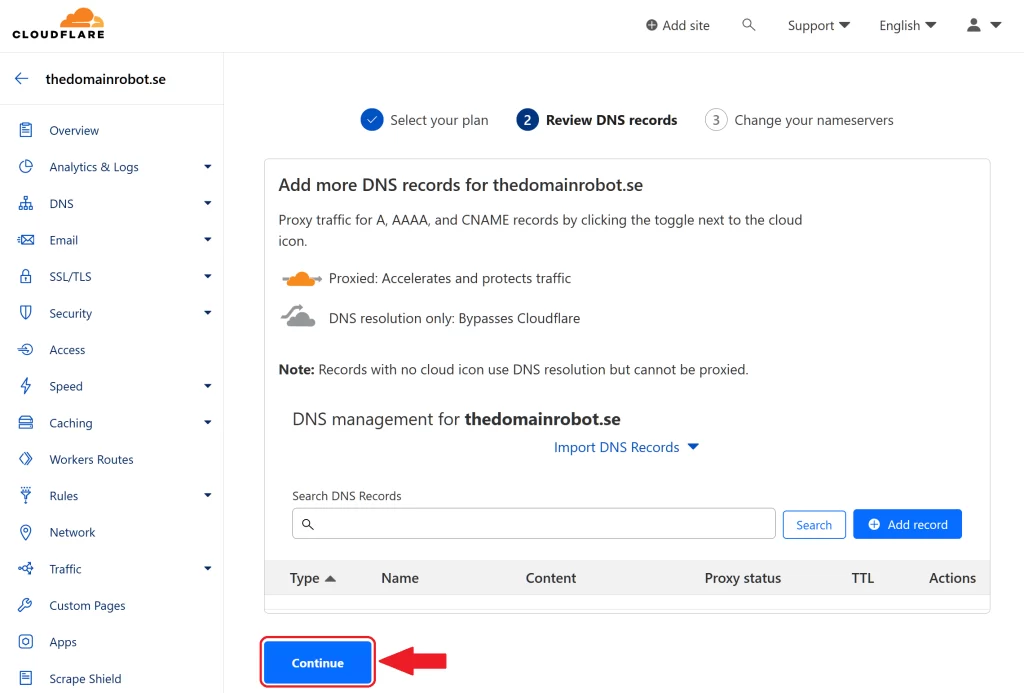
Step 8 – Confirm DNS and continue
When Cloudflare is done fetching your DNS records – press the “Continue” Button
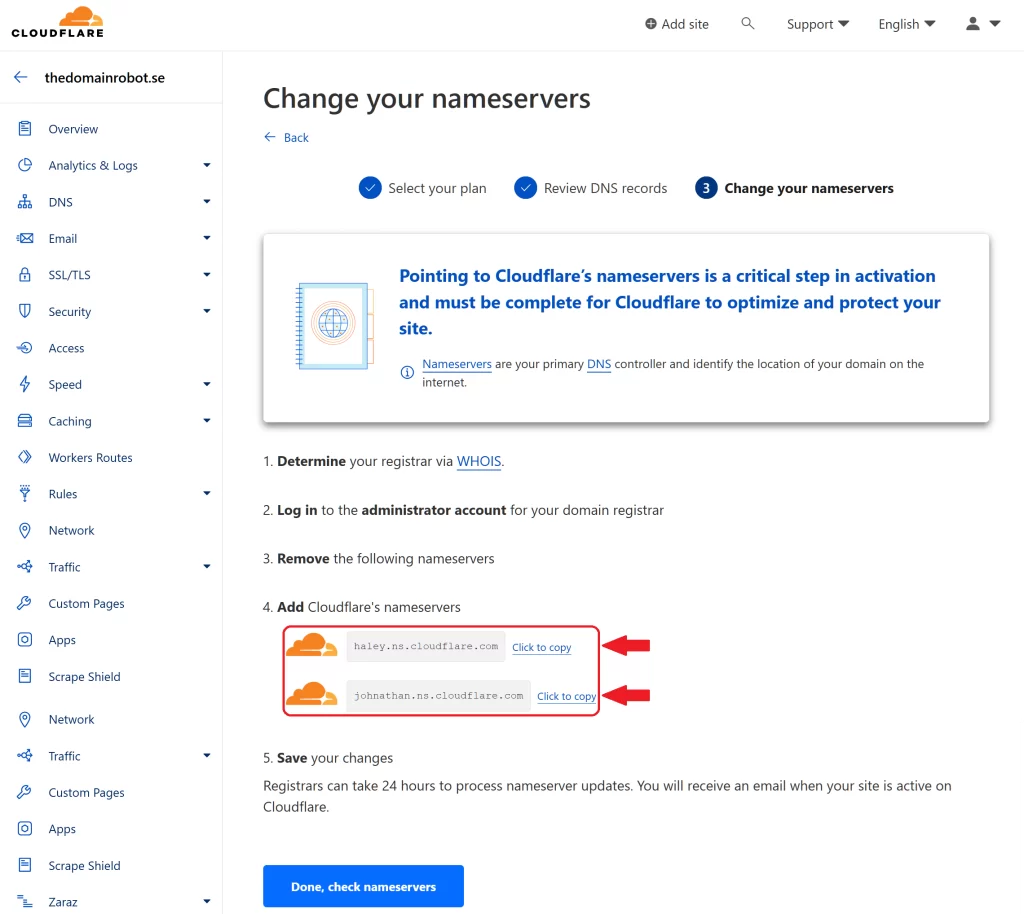
Step 9 – Change Domain Name Servers
Next you will be asked to change your domain name servers – this is the “hard” part of switching to Cloudflare. Because every domain registrar has a different way of changing Nameservers, you might have to find a specific guide for the domain registrar.
We have made guides for the biggest domain registrars as of 2024:
If we have not made a guide for your current domain registrar – you should be able to find it by googling:
“How to change nameserver [Your-domain-registrar here]”
When you have copied your new Cloudflare nameservers, and updated your domain’s nameservers at your domain registrar – press the “Done, check nameservers” button.
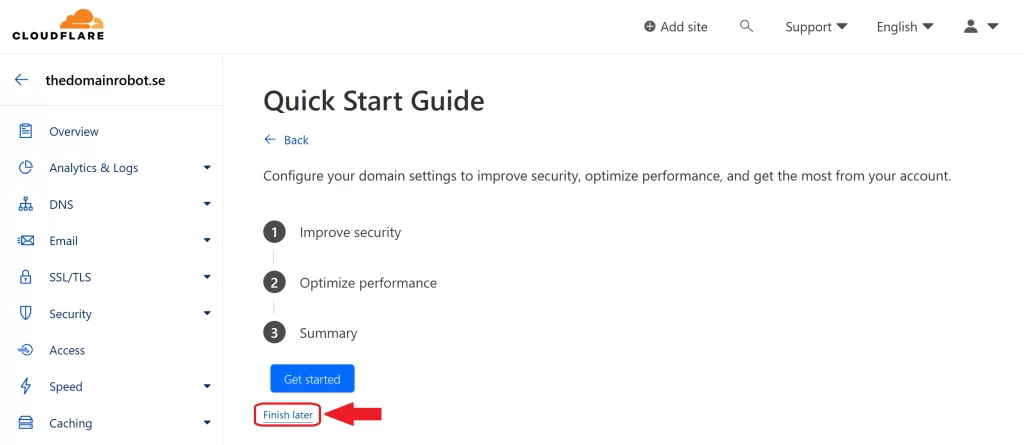
Step 10 – (Quick Start guide &) Finish later
As a start, we would recommend NOT to use Cloudflare’s Quick Start guide. Reason being, if you just swap DNS, and nothing else – essentially you are just moving your DNS records to a new server, and nothing can go wrong.
As a good rule of thumb – its a good idea ALWAYS to do one thing at a time – and when you know that works, you can start with the next
So instead of following the guide – just press the “Finish later”, and return to the guide when you are sure everything is running smoothly!
Step 11 – Go back to your Cloudflare dashboard
The easiest way to see the status of your domain is on your Cloudflare Domain Dashboard – so go back to the Dashboard by pressing the “Arrow back”, next to your domain name
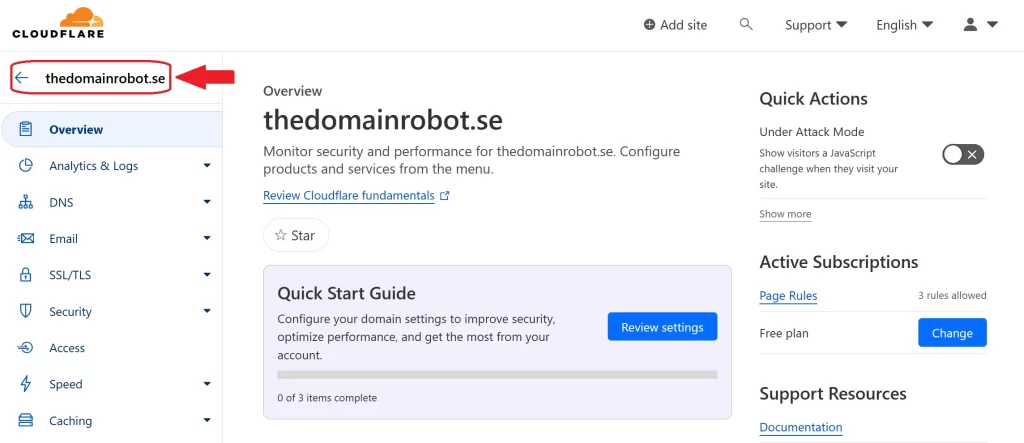
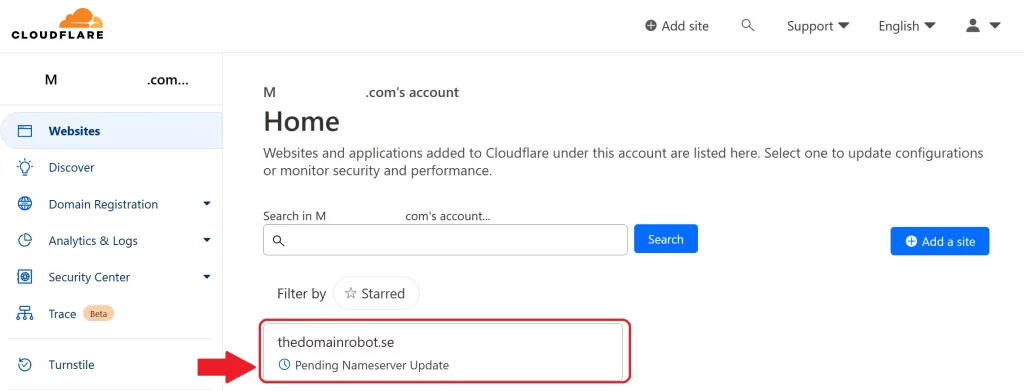
Step 12 – Wait for your nameserver to change
Because of how the internet works – changing Nameserver can take betwen 30 min and 24 hours to change, depending on your Domain Registrar. So you now have to patiently wait, for your Domain Registrar to update the changes to your Domain nameserver. But this doesn’t mean that your domain will be offline during this time ! – don’t worry, your website will be online through the whole process, most likely nobody is every going to notice you switching DNS
The easiest way to see the status of your Nameserver change is on the Cloudflare Domain Dashboard. Cloudflare change the status of your domain, when the change is online.
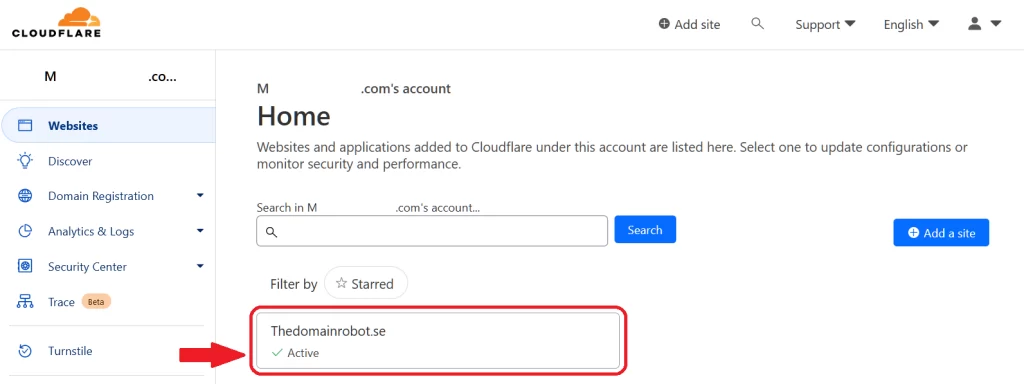
Step 13 – Your domain is now active
Congratulation! you are done – your domain is now using Cloudflare’s DNS and CDN.
Our other Cloudflare Related Guides
When you have managed to If you’re eager to deepen your understanding of Cloudflare and its suite of tools, you’ll find our archive of Cloudflare-related guides invaluable. From setting up your first domain to optimizing website performance with Cloudflare’s caching options, our comprehensive tutorials are here to assist. Don’t miss out on the wealth of knowledge we’ve compiled to help you make the most of Cloudflare’s offerings. You can explore our other guides here:
- Your Ultimate Guide to Cloudflare Domain Redirect
- How to Turn on The Free Cloudflare Proxy Service
- Secure your website with the Free Cloudflare Bot Fight Mode
- Secure Your Assets, with Cloudflare Hotlink Protection
- How to Instantly Purge Cloudflare Cache
- How to Set Cloudflare Browser Cache TTL
- How to Redirect an Expired Domain with Cloudflare
- How to Enable Cloudflare Compression to Speed Up Your Site
- How to Enable Auto Cloudflare Minify for Free Performance
- How to Enable the Cloudflare Block Country Feature
